 Subscribe
- I have a new website! (No, I don’t…;) January 21, 2016So, I just linked this blog that you’re reading here, up with my new website! My website is called Modern Making and it’s kind of a way for me to feel a little more organized about my creative endeavors because … Continue reading →Kelli
- Happy January! January 14, 2016This is what I saw as I was walking out my front door this morning to walk the girls to school. It’s a phone pic (btw, my Nikon is mysteriously out of commission for the time being so it’s phone … Continue reading →Kelli
- Quick Vintage Estate Sale Quilts! July 2, 2015So, I found two quilt tops at an estate sale near Seattle not too long ago and was instantly in love with them for several reasons; first, because they are completely completed quilt tops (the hard part is done!!!); second, … Continue reading →Kelli
- Fabric Stash Annihilation June 4, 2015In an effort to really get all of my sewing stuff squozen (yes, I understand that’s not actually a word; but it should be) into my little sewing closet; I’ve decided to take quite a historically different and ground-breaking approach … Continue reading →Kelli
- Closet Sewing! May 16, 2015My sewing closet is finally finished! So, in this house with limited rooms, I converted the coat closet into a sewing room (by “I”, I mean Dave) when we moved in but this week I actually put the finishing touches … Continue reading →Kelli
- House stuff February 21, 2015I’ve been doing some things around this house lately, like paper organizing and minor gardening for lazy beginners. And I actually found all the parts to my camera and replaced the parts that were “lost in the move” and remembered … Continue reading →Kelli
- Long time, no post… December 6, 2014So, I guess I can say that I’m consistent at being inconsistent, right? Is there any scenario where that’s a good quality and not a character flaw? I don’t have any excuses for not blogging in 11 months. Actually, I … Continue reading →Kelli
- Just in time for Valentine’s Day…a truffle! January 30, 2014This little truffle is from the original box of truffles that I did a while back. I didn’t write any of it down when I originally made it, and while the truffles are simple, I did need to make another … Continue reading →Kelli
- We made it! January 5, 2014We made it all the way from Fredericksburg to Seattle this weekend and are finally figuring out how to move forward a tiny bit. The trip was as expected for the most part. We left last Sunday and arrived Friday … Continue reading →Kelli
- One day to move December 28, 2013So the past week or so has been hard core moving…packing,loading, cleaning, crying, fixing, getting rid of, deciding, Christmas, more loading, hoping, planning, more cleaning, more fixing, painting… Oh, and BTW, we have too much stuff. This was when I … Continue reading →Kelli
- I have a new website! (No, I don’t…;) January 21, 2016
Free Crochet Patterns
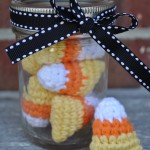 Bite-Size Candy Corn
 Chocolate Valentine Truffle and Wrapper
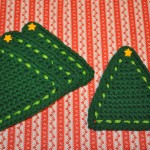 Christmas Tree Coasters
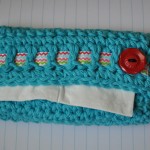 Crochet Tissue Cozy
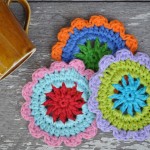 Cute Cotton Coasters
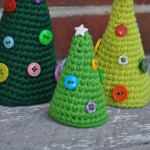 Cute Little Christmas Trees
 July 4th Pennant Bunting
 Mini Frankenstein
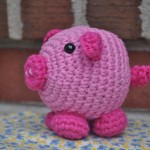 Petunia the Palm-Size Pig
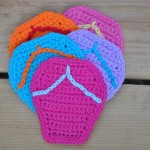 Summertime Flip Flop Coasters
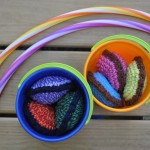 Super Fun Bean Bags
 Sweet Strawberry Coaster
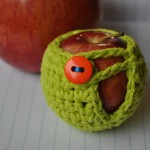 Teeny Tiny Apple Sweater
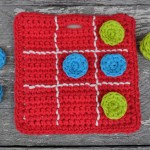 Tic-Tac-Toe Travel Game
Category Archives: How-To’s
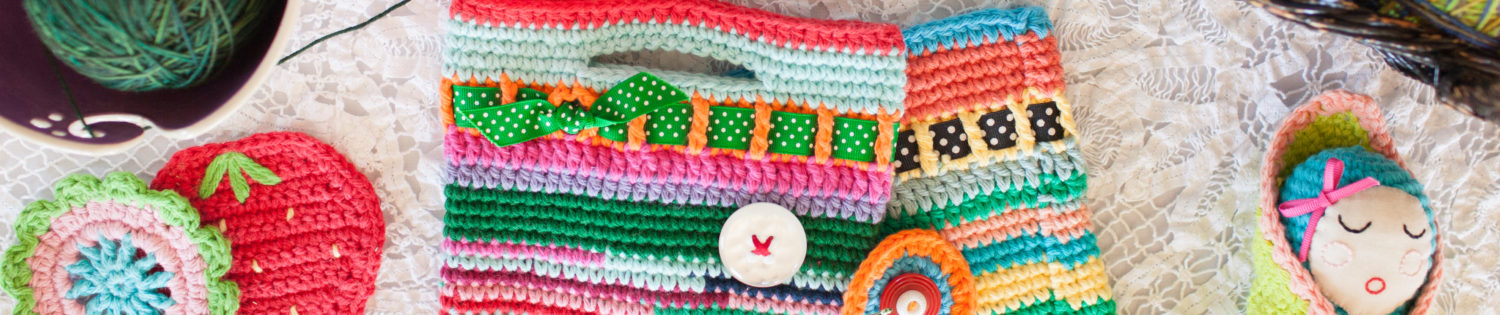
Crochet Tissue Cozy Pattern
Materials: U.S. size 9 or ‘I’ hook Cotton worsted weight yarn (Lily Sugar ‘n Cream) Yarn needle 7″ piece of 3/8″ wide grosgrain ribbon One button (3/4″ vintage plastic shown) Needle and thread for sewing button Here’s my simple pattern … Continue reading
Posted in Crafts, Crochet, Gifts, How-To's
2 Comments
Sewing Buttons onto Finished Crochet
As you know, I crochet tons of stuff and I sew buttons to most all of it; mostly because buttons make everything better, right? Agreed. So, I wanted to show how I sew buttons onto my finished crochet projects because … Continue reading
Posted in Crafts, Crochet, How-To's
6 Comments
Crochet Tic-Tac-Toe Travel Game
Here’s a super easy tic-tac-toe game to crochet. The kids are learning to play and they can take this version with them wherever we go because the game board doubles as a pouch for the game pieces. Here’s how to … Continue reading
Posted in Crafts, Gifts, How-To's, Kids
12 Comments
Easter (Trick-or-Treat) Basket How-To
These are the trick-or-treat baskets that I was going to recover for Halloween, but never got around to it. I decided I’d do one for Easter instead. These are really crappy instructions, mostly because I made it up as I … Continue reading
Posted in Crafts, Holiday, How-To's
2 Comments
Kid Cape How-To
This is my third kid cape. I made these two for the girls for this last Christmas. Kid capes are super easy and fast to make. Here goes… First, you’ll need a half yard of fabric, about two yards of … Continue reading
Posted in Crafts, Gifts, How-To's, Kids
2 Comments
Holidays in Review
Thought I would post a quick holiday review… Here are some Christmas morning highlights: The super girl capes I made for the girls… Nothing says ‘Christmas morning’ better than bed head… …and hot cocoa mustaches… and then there were the … Continue reading
Fruit Pizza…
…one of the best summer things ever. Seriously, if you haven’t made fruit pizza yet, you’re missing out. Here’s the recipe. You could probably make a good-for-you hippy version somehow, but this is the quick and dirty version that’s full … Continue reading
Eating on the cheap just got a little better…
Holy crap – This is the best thing ever! So, often I wonder if I’ve happened onto something super awesome and must spread the word; or if I’m simply the last to know…? This is one of those times. We … Continue reading
Posted in How-To's
2 Comments
Easiest Bag Ever How-To
I made another easiest bag ever and I have attempted a tutorial for it here. Something that you should know about all of my projects before you attempt this one: everything I make is imperfect. So, this is really a … Continue reading