Make Pickled Jalapeños!

If you like pickled things and soy sauce and jalapeños, you should totally do this. My friend Sherry showed me how to make these when she was visiting and they are super easy…

(Apparently I haven’t yet mastered the iPhone post, as all the photos appear at the bottom…at least they’re in order…)

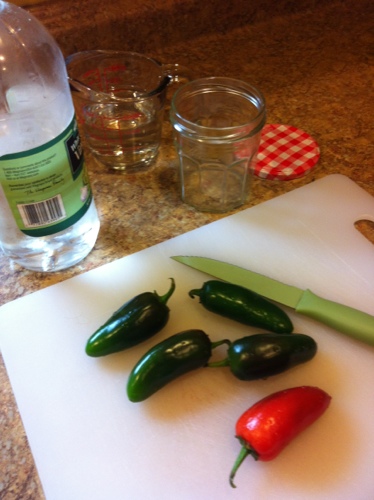
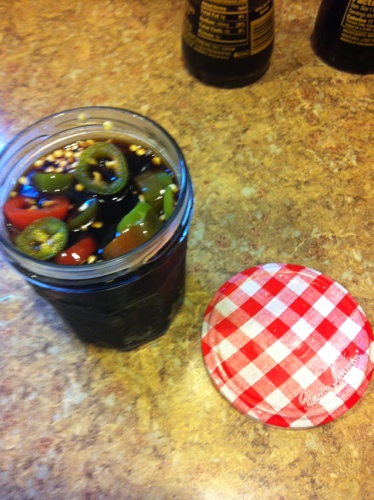
1. Get some fresh jalapeños. (apparently they turn red if you forget about them for a while…)

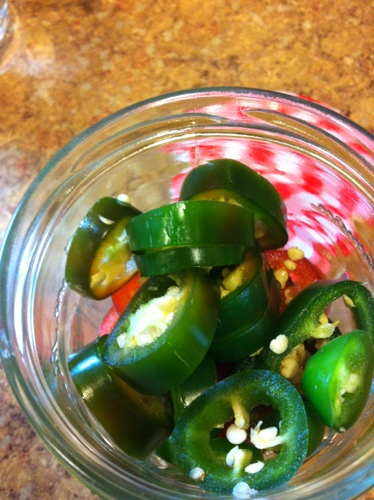
2. Cut them into rings.

3. Fill a jar with the rings (seeds and all).

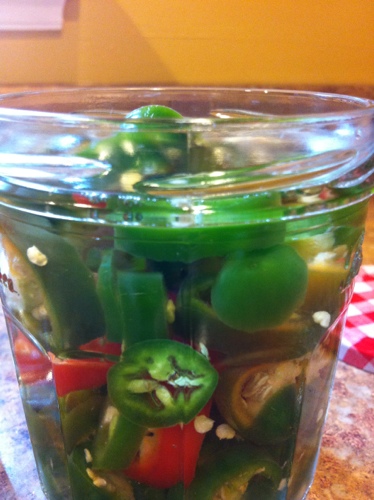
4. Fill jar half way with distilled white vinegar.

5. Fill the rest of the way with water.

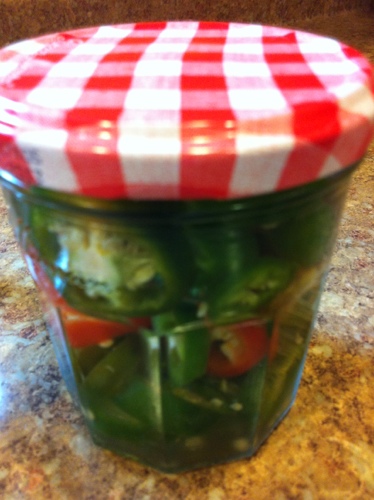
6. Put on a tight lid.

7. Shake and put in the fridge for 8 days.

8. On the eighth day, strain out all the liquid, keeping all the jalapeños in the jar and fill the jar completely with soy sauce. Leave in the fridge for 30 days and then enjoy!

(I’m told they are really good on rice and stuff but I wouldn’t know because I don’t like jalapeños!)

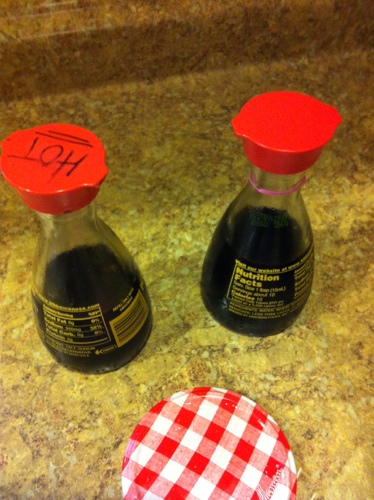
Plus, when they’re all gone, you have some spicy soy sauce! (mark it well though…the girls went an extra step with the pink hair band so there would be no confusion about which was which)

20120827-091959.jpg

20120827-092051.jpg

20120827-092102.jpg

20120827-092109.jpg

20120827-092117.jpg

20120827-092129.jpg

20120913-171753.jpg

20120913-171829.jpg

Posted in Good Food | Tagged , , , , | Leave a comment

Free Crochet Patterns at Tangled Happy!

I was linked to the Tangled Happy blog again – yay! (LOVE that blog) If you like FREE like I do and you love to crochet; check it out, as there are tons of links to great crochet patterns and inspiration.

Posted in Crafts | 2 Comments

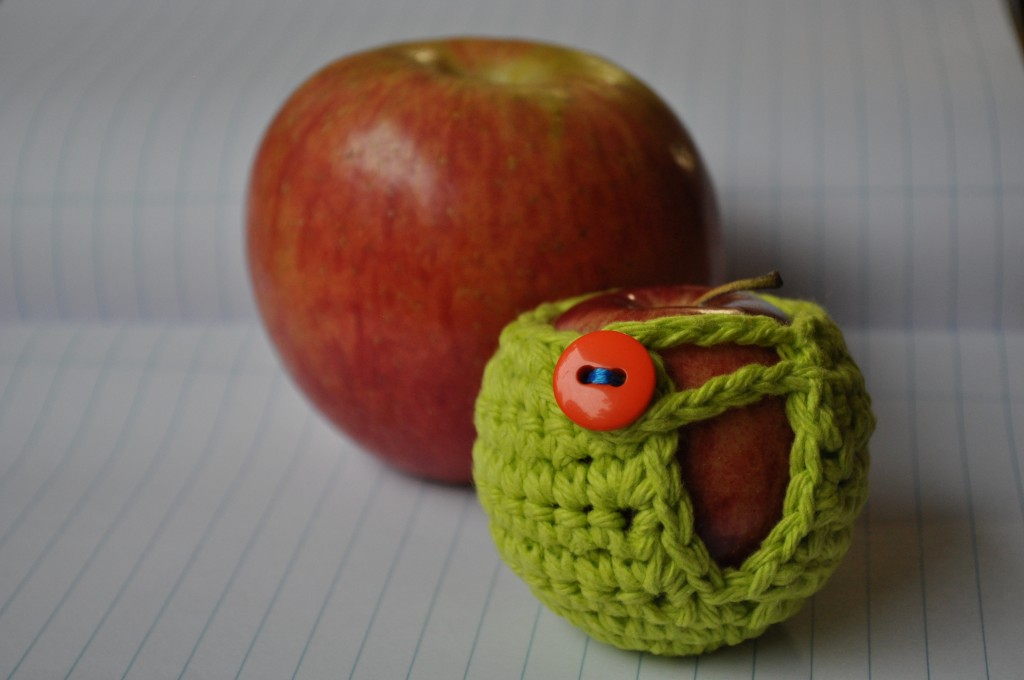
Crochet a Teeny Tiny Apple Sweater

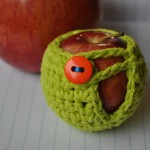
I kind of fell in love with crocheting apple cozies last fall but it took me some effort to find a pattern I liked. None of them seemed to fit nicely on the apples in my house…which is puzzling because I don’t think we have freaky apples here; in fact I think most of them come from the same wonderful double-you state (that I miss terribly). The local orchard apples weren’t fitting them either for that matter. Anyway, I finally pieced together a few of the patterns I found online and added some of my own thoughts and came up with one that I really liked…then I made a ton (as many of you know).

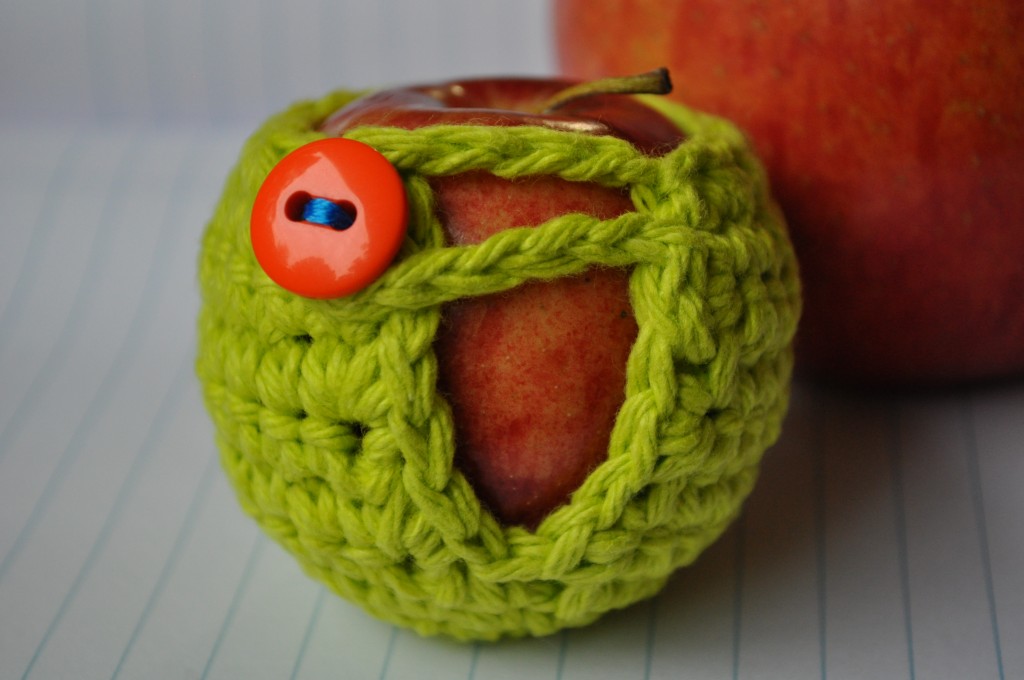
Well, after all that effort, and making sure that everyone in our house had their very own apple cozy; we were at our favorite local grocery store where we saw these teeny tiny apples. Really, the cutest apples we’ve ever seen at a grocery store. (They’re roughly the size of a clementine orange.) And of course, the girls had to have them because they were so cute and they really go nuts for anything that they can place the word ‘baby’ in front of…and there are always a lot of “aaawwwwww’s” and so on when that happens. Needless to say, in an instant, the girls basically switched from apple cozy-size apples to these random, teeny apples…and it’s not like they can just go around naked. Right?

So, here’s my pattern for teeny tiny apple sweaters; because everyone gets a sweater, no matter their size…

Using a size G hook and cotton worsted weight yarn; make an adjustable ring (the first part of the pattern is worked in a continuous spiral; use a stitch marker and do not join rounds)
Rnd 1: 6 sc in ring (6 sts)
Rnd 2: 2 sc in each st around (12 sts)
Rnd 3: (1 sc in next st; 2 sc in next) 6 times (18 sts)
Rnd 4: (1 sc in next 2 sts; 2 sc in next) 6 times (24 sts)
Ch 1, turn (the rest of the pattern is worked in rows)
Row 5: sc in first 11 sts; 2 sc in next; sc in next 11 sts; chain 1, turn (24 sts)
Row 6: sc in first 7 sts; 2 sc in next; sc in next 8 sts; 2 sc in next; sc in last 7 sts; ch 1, turn (26 sts)
Rows 7-9: 1 sc in ea st; ch 1, turn (26 sts)
Row 10: (1 sc in first st, dec in next 2 sts) 8 times; 1 sc in ea of next 2 sts; do not turn (18 sts)
Making the ‘V’: 2 sc in same st as last of row 10 (this is the corner at the top right side of the ‘V’); continuing down the side of the ‘V’, skip the first space, 2 sc in next space; skip 1 space; 2 sc in next space; skip 1 space; 1 sc in bottom of ‘V’; continuing up the other side of the ‘V’, 2 sc in first space; skip 1 space; 2 sc in next space; skip 1 space; 3 sc in next space (corner at the top left side of the ‘V’)
Row 11: (1 sc in first st, dec in next 2 sts) 6 times; do not turn (12 sts)
Making the loop: sl st in next st; ch 12; sl st in same st; sl st in next 3 sts; fasten off and weave in end.

Sew a little button on and you’re done!

Posted in Crafts, Crochet, Gifts, Good Food | Leave a comment

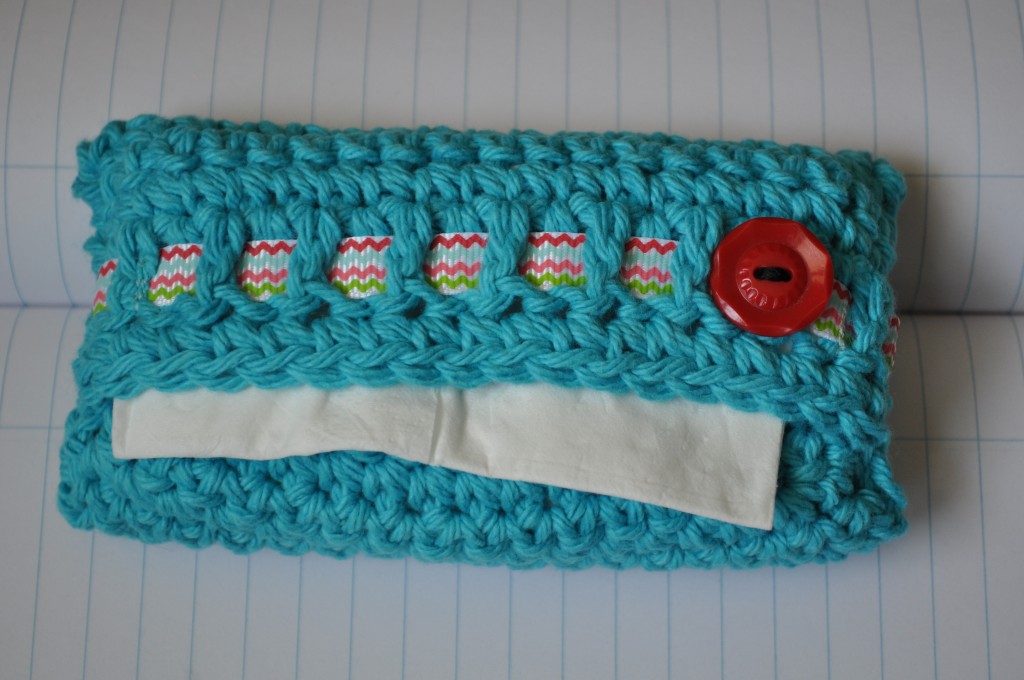
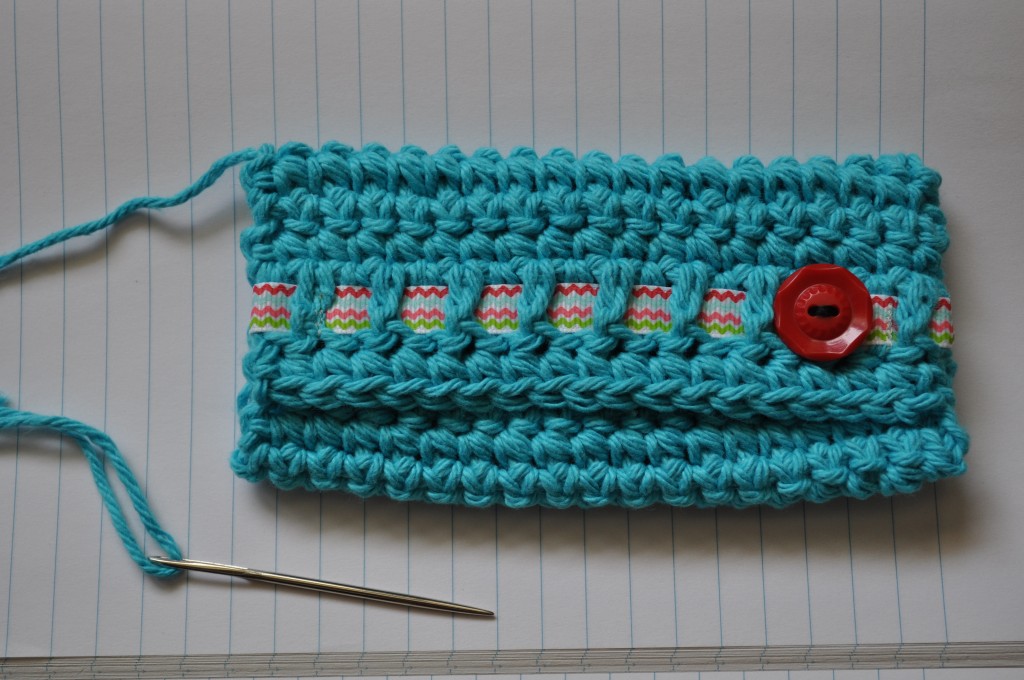
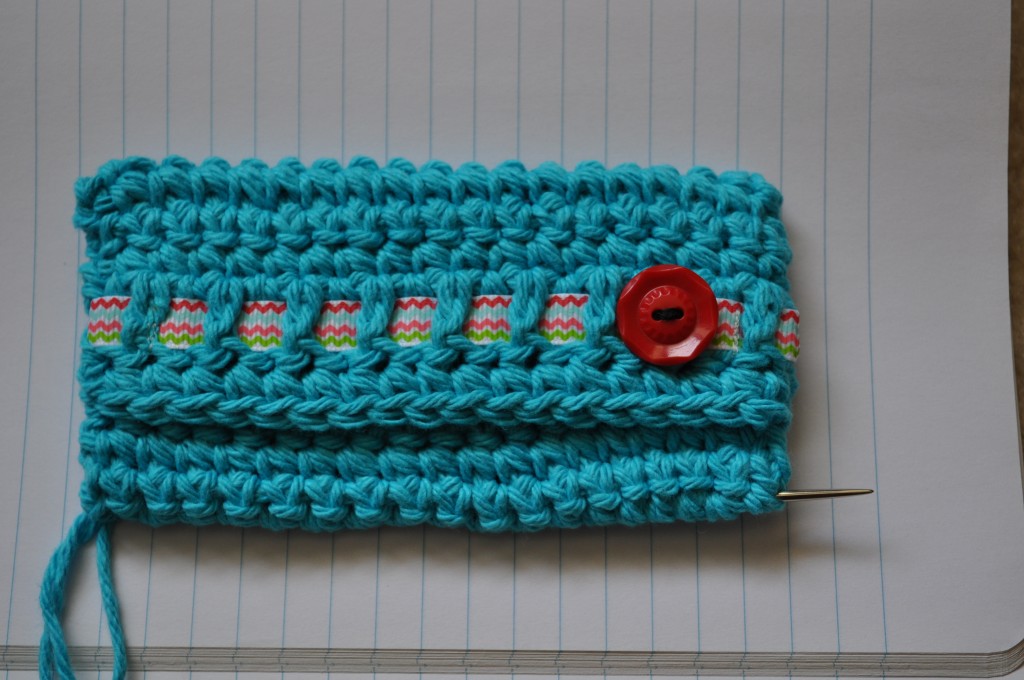
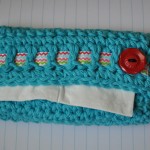
Crochet Tissue Cozy Pattern

Materials:
U.S. size 9 or ‘I’ hook
Cotton worsted weight yarn (Lily Sugar ‘n Cream)
Yarn needle
7″ piece of 3/8″ wide grosgrain ribbon
One button (3/4″ vintage plastic shown)
Needle and thread for sewing button

Here’s my simple pattern for a cute little personal tissue holder:

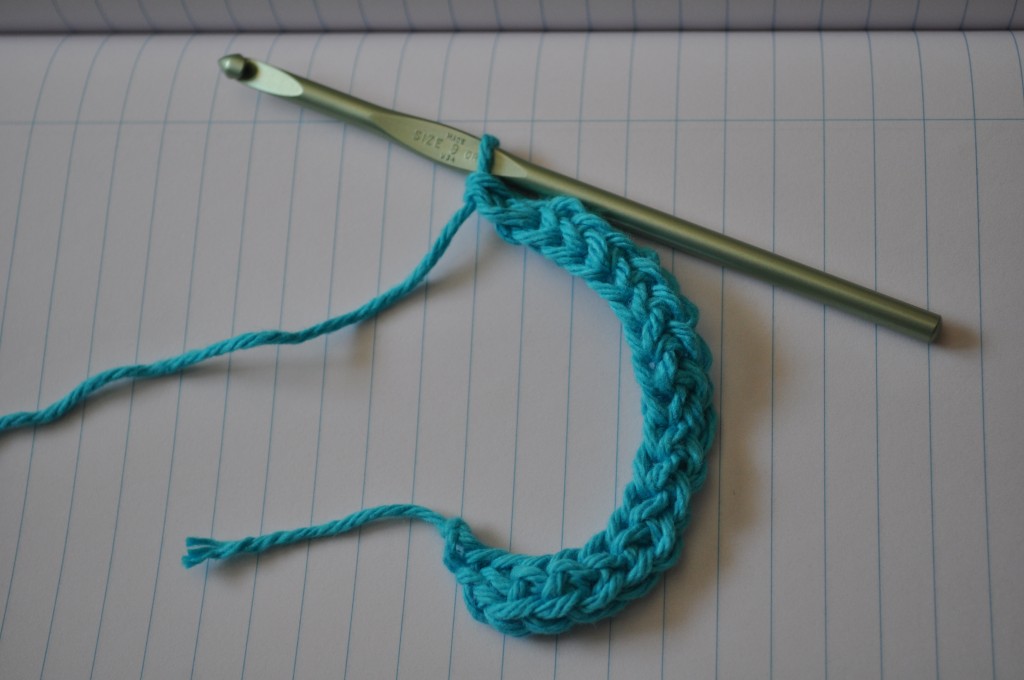
Make a chain-free single crochet foundation of 18 stitches – Future Girl provides a great tutorial here for chain-free foundations – (or, if you don’t do chain-free foundations, simply chain 19 and make a single crochet row of 18 stitches beginning in the second chain from hook); ch 1, turn (at the end of each row, chain 1 before turning).

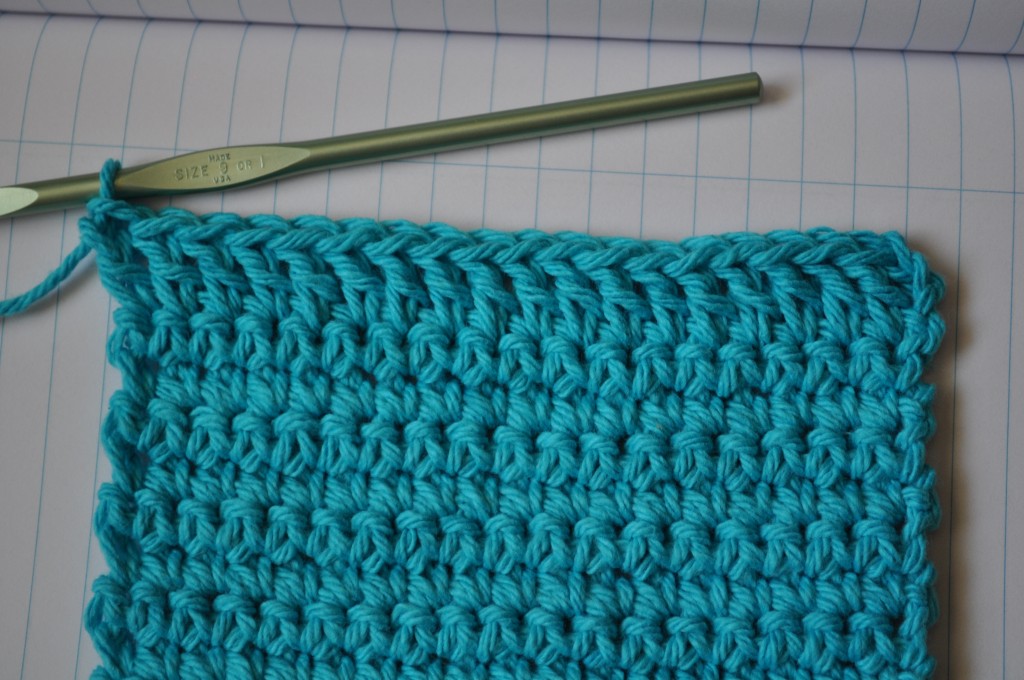
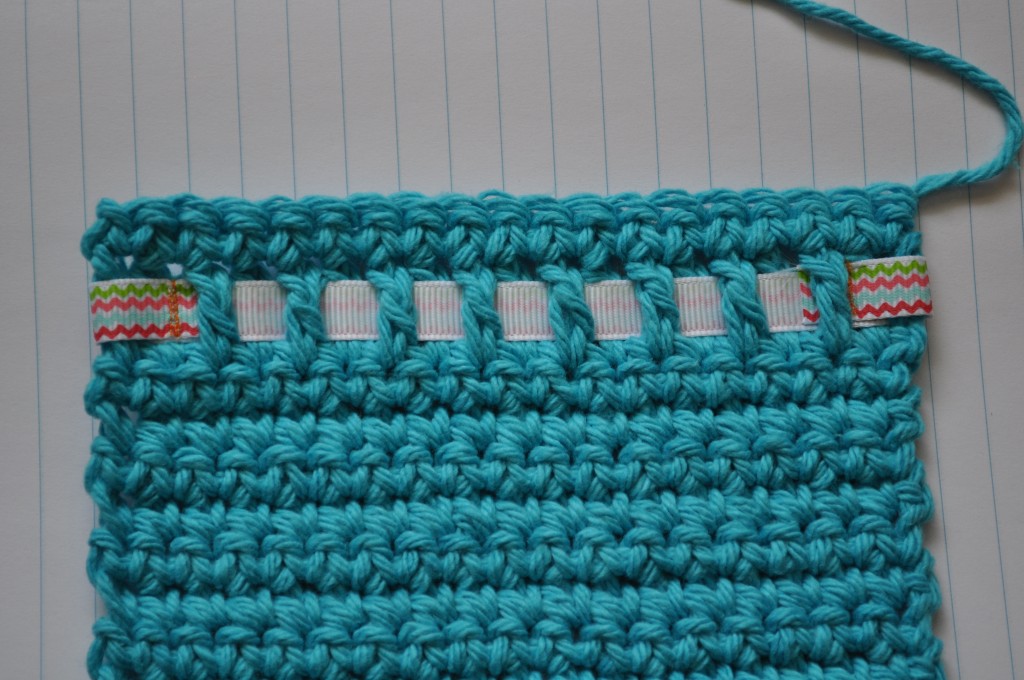
Here is a photo of my chain-free foundation (it curls a little more than a chain foundation, but it straightens out as you add more rows).

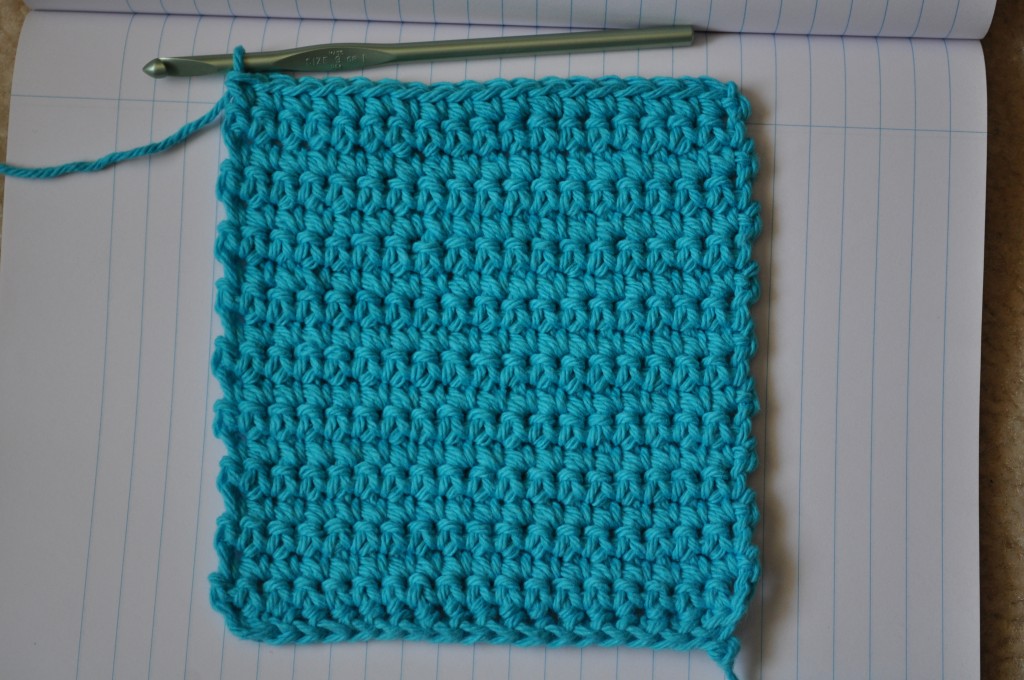
Rows 2-19: Sc in ea st to end of row (18 sts)
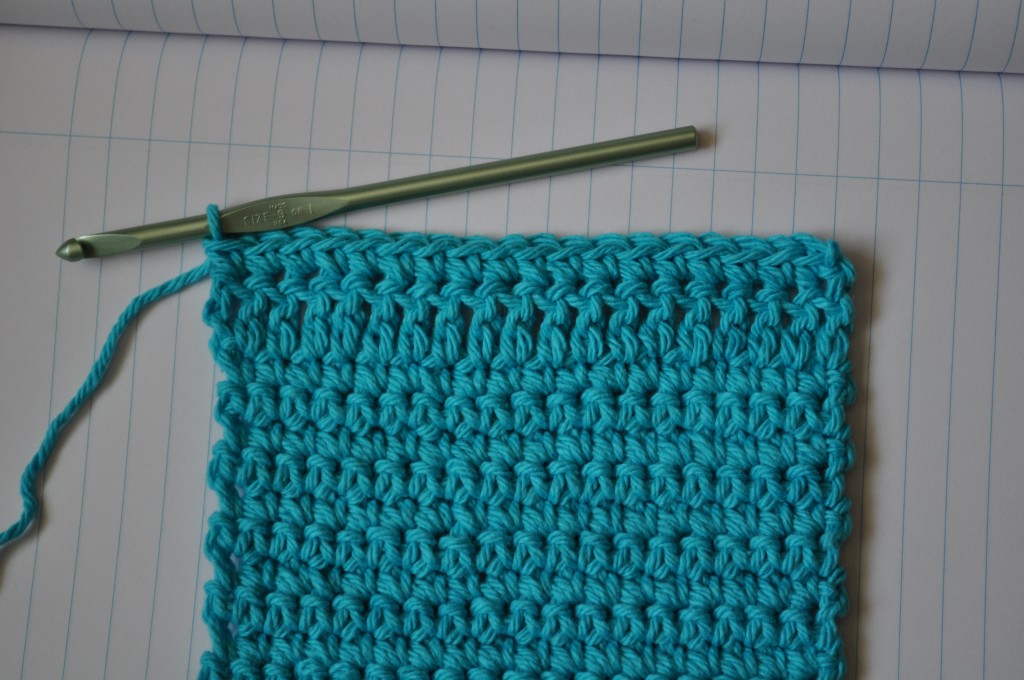
(at the end of row 19, chain 3 for the turning chain)

Row 20: Dc in ea st to end of row (18 sts)

Row 21: Sc in ea st to end of row (18 sts)

Leave a long tail approximately 36 inches in length and fasten off; do not weave in end.

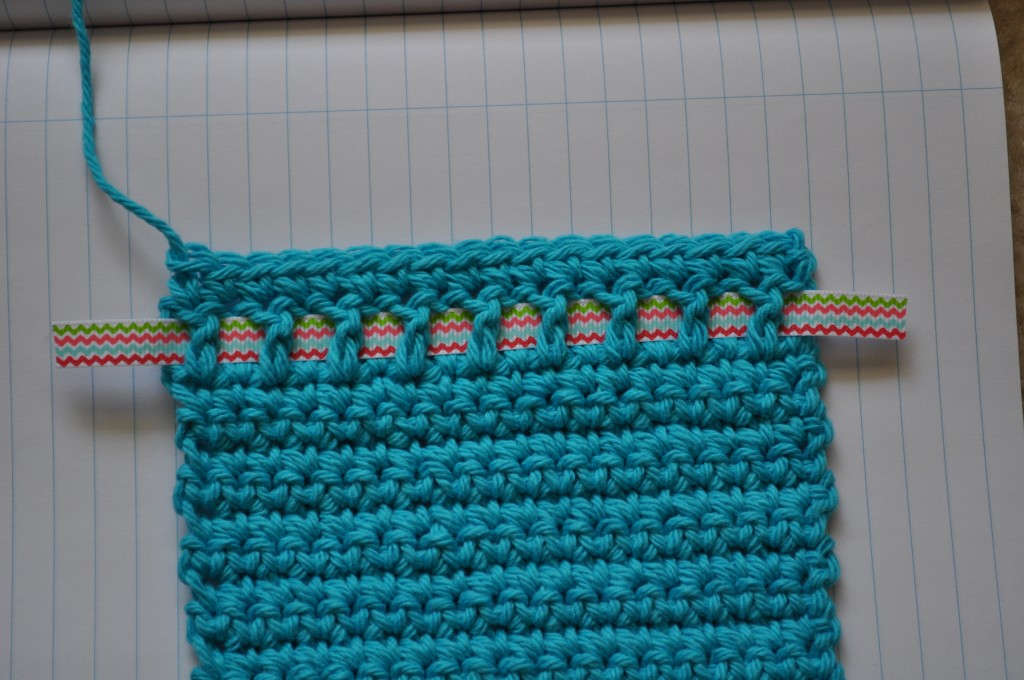
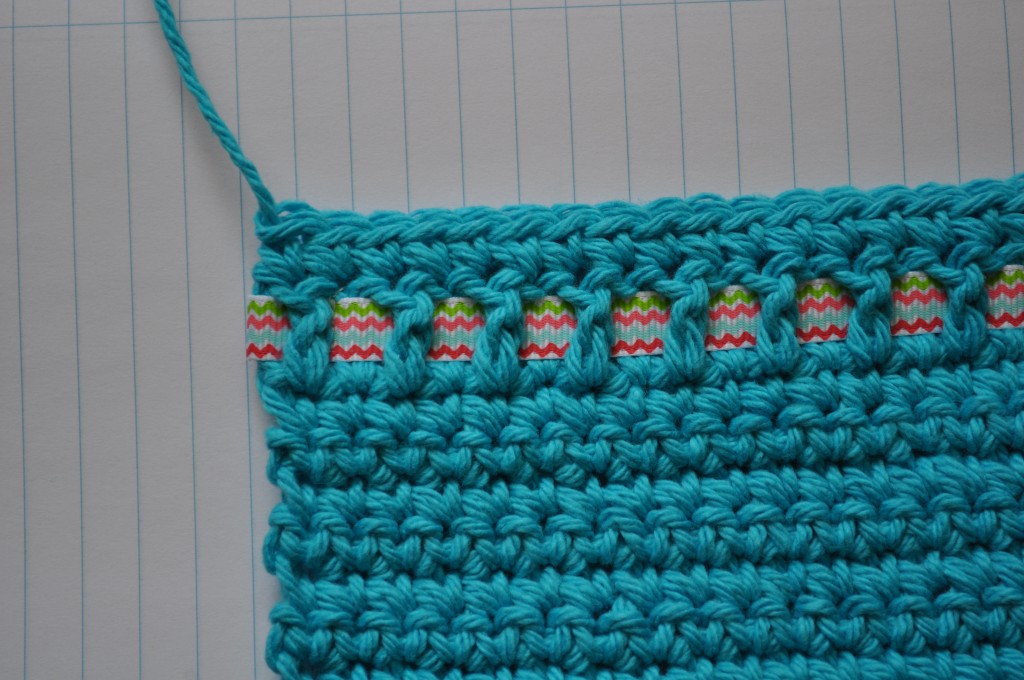
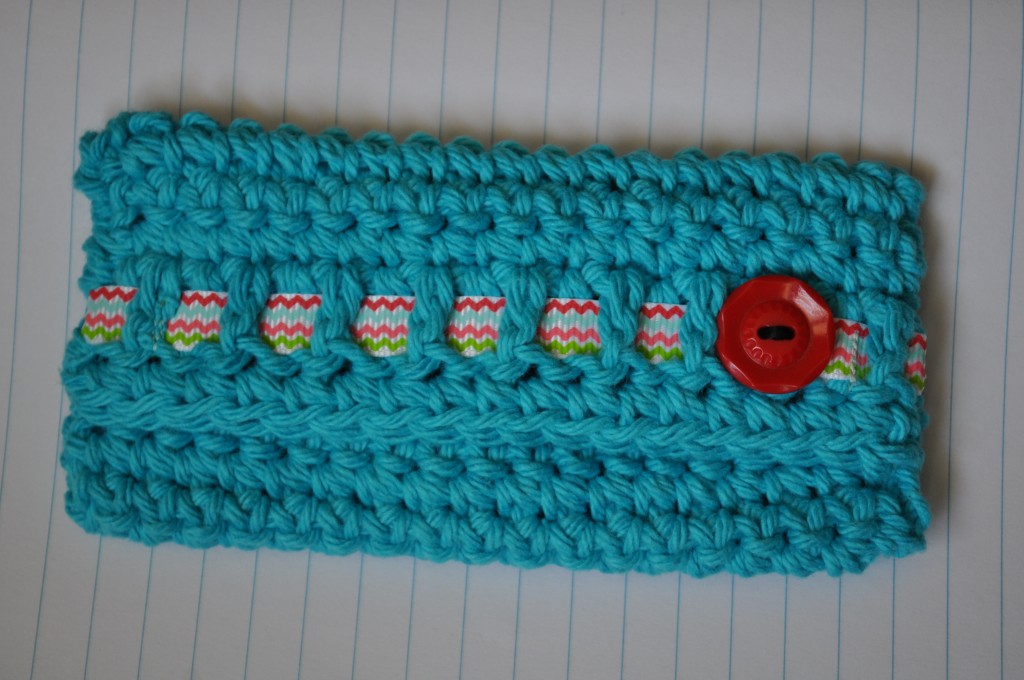
Weave the ribbon through the double crochet row, ensuring that the ribbon ends go over the outside double crochet posts instead of under them.

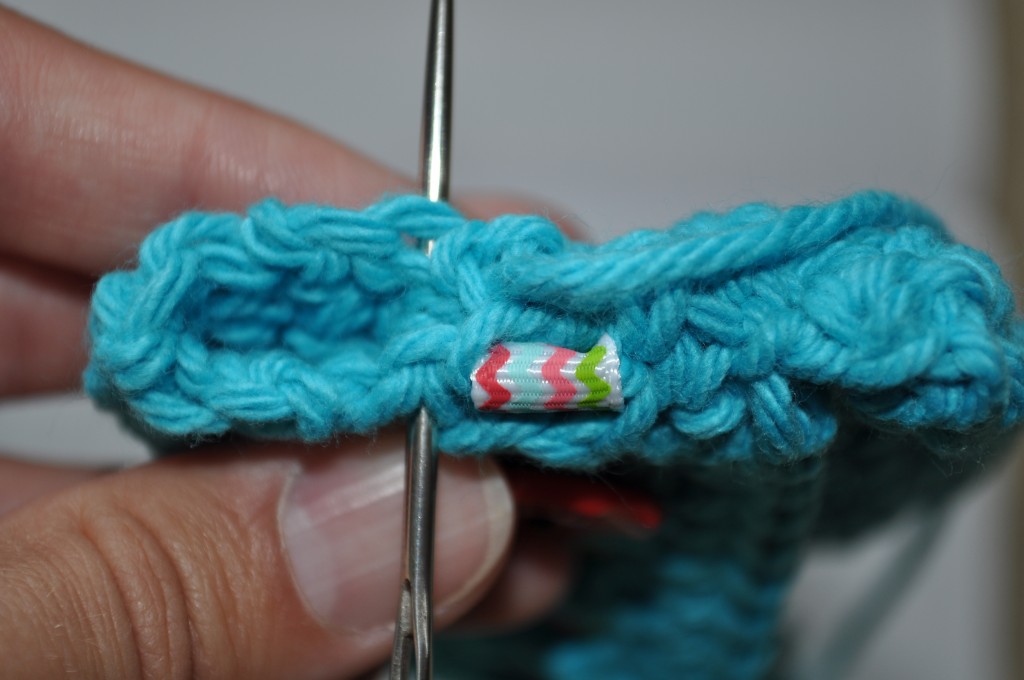
Fold the ribbon ends under your work and sew the ribbon to itself using a coordinating thread that will blend in with the ribbon color. I use my sewing machine and I back stitch a couple of times to make it secure.

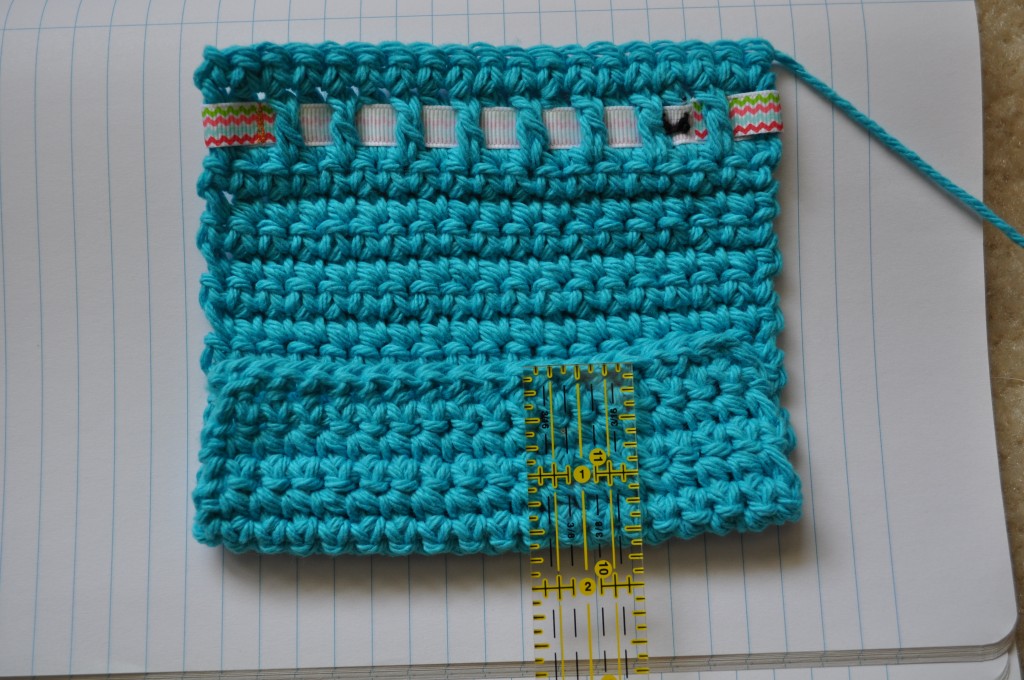
Here’s the underside.

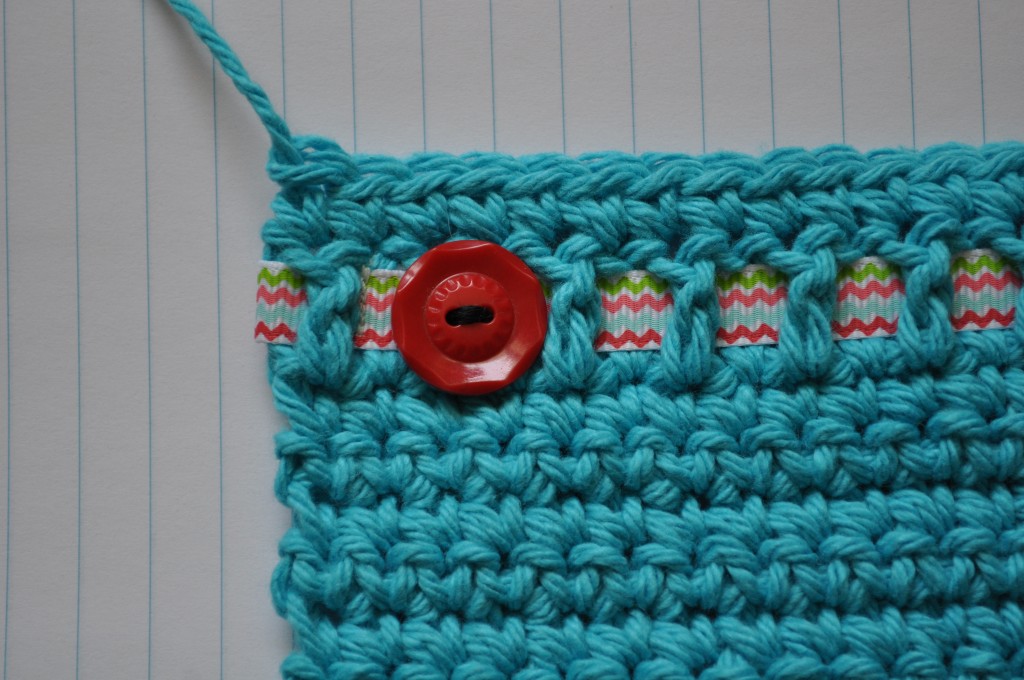
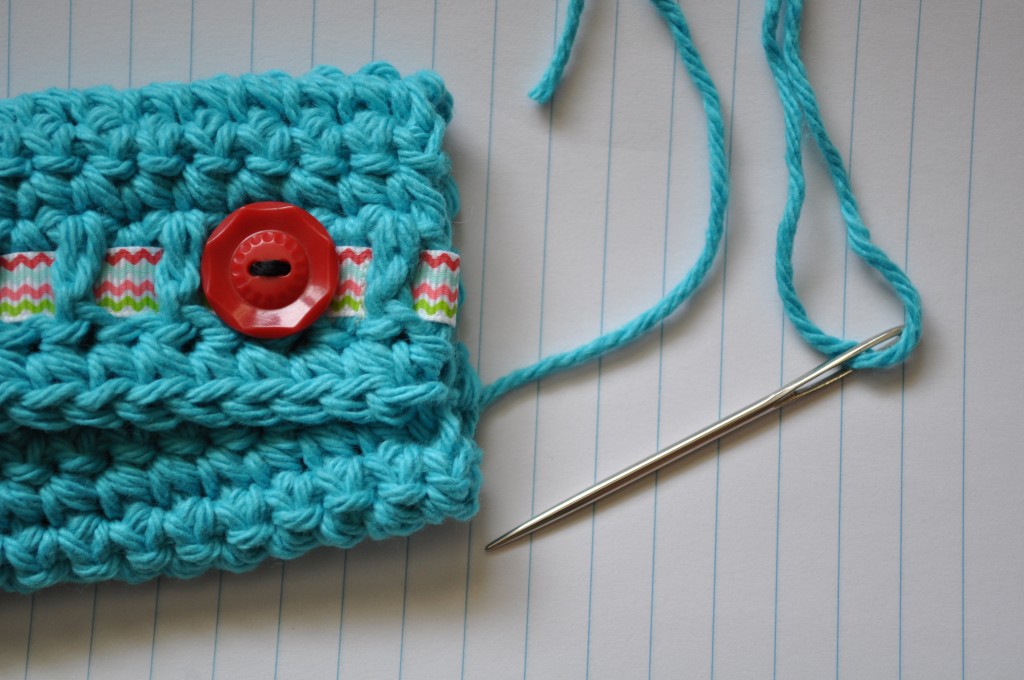
Next, sew the button in place over the second double crochet post in from one side (there should be 9 posts showing on the front).

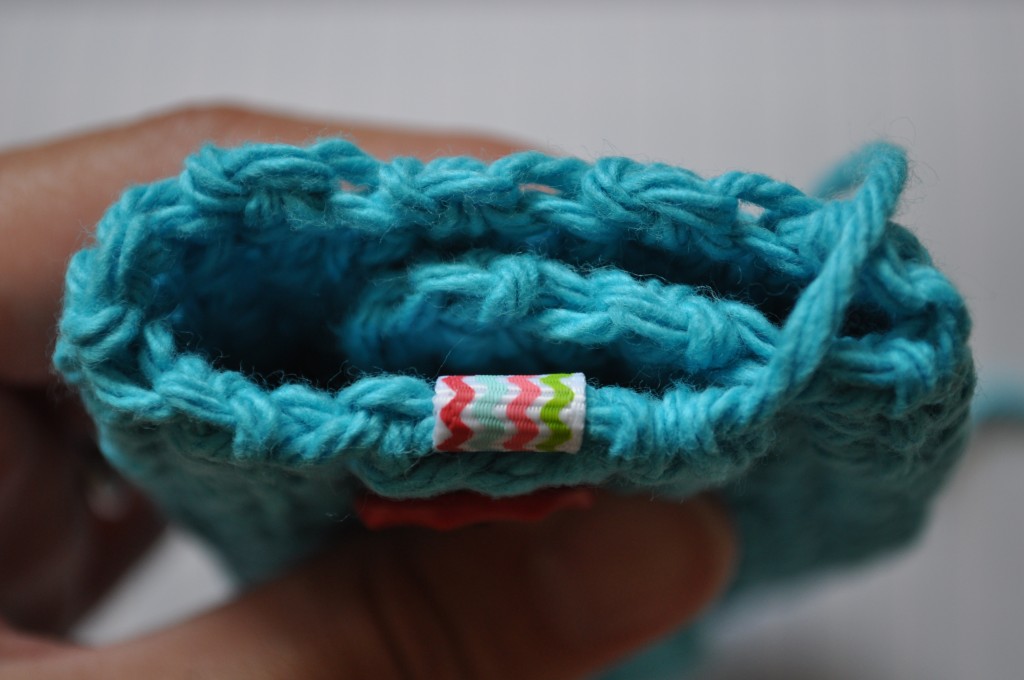
Fold the top and bottom edges toward the center of the piece so the bottom is folded up approximately 1 1/2″.

And the top edge is folded approximately 2″.

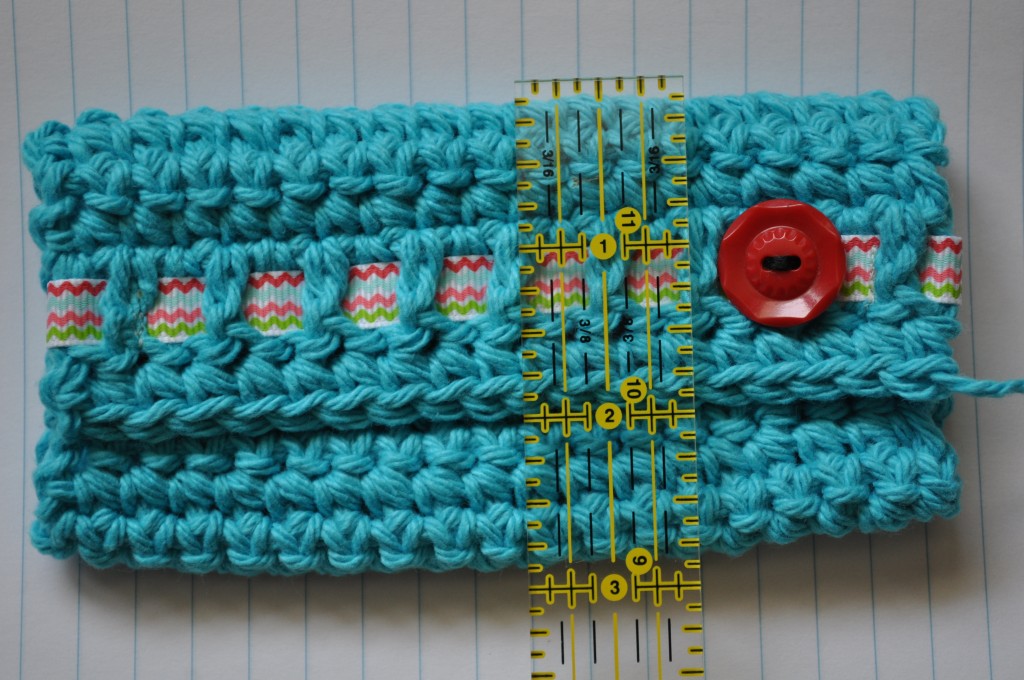
There should be an overlap of about an inch.

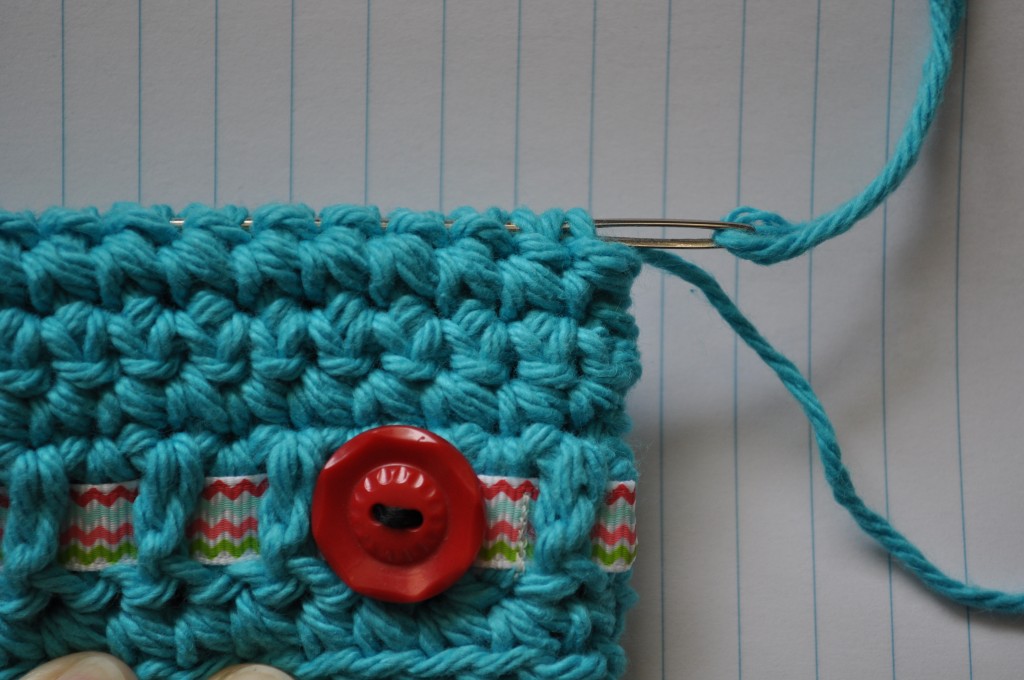
Next, using a yarn needle, sew up the sides with the long tail you left.

Be sure to sew through all three layers where they overlap.

When you get to the end of one side, weave your yarn all the way across the bottom or top edge to the other side instead of cutting it and starting over. The side sewing should all be one continuous strand.

When you’re done stitching the sides, weave your end all the way across the top or bottom edge of the project to secure it and then trim the end.

Put some tissue inside and you’re done!

Posted in Crafts, Crochet, Gifts, How-To's | 2 Comments

Crocheting Over Ends

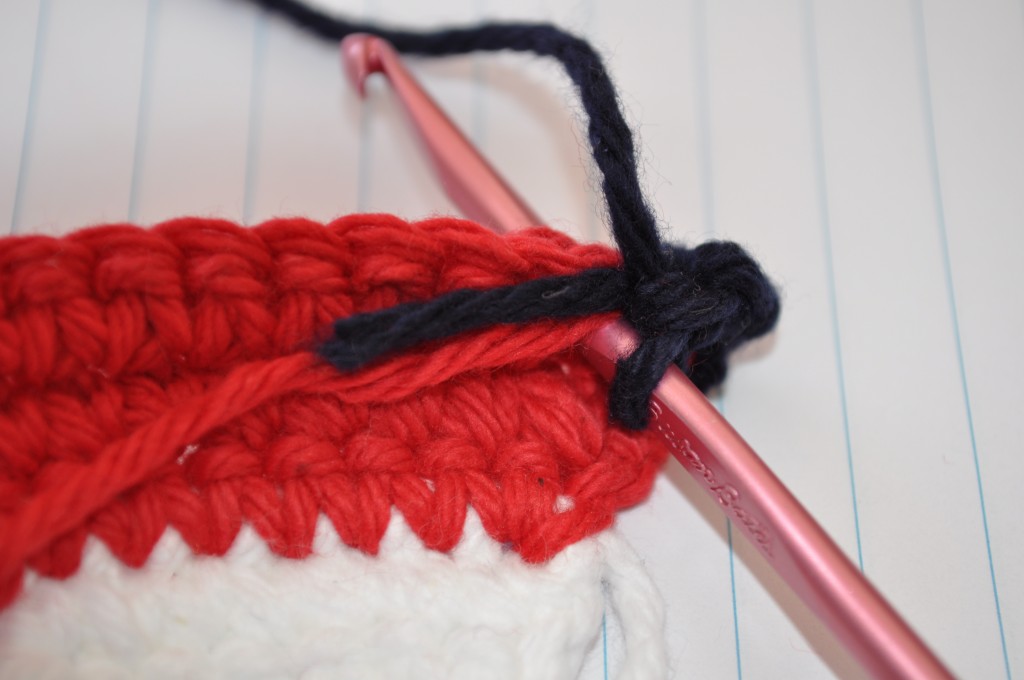
So, if you don’t want to have to weave in a bunch of ends after changing colors multiple times throughout a project, you can crochet over them as you go.

Here’s how:

First, the color change.

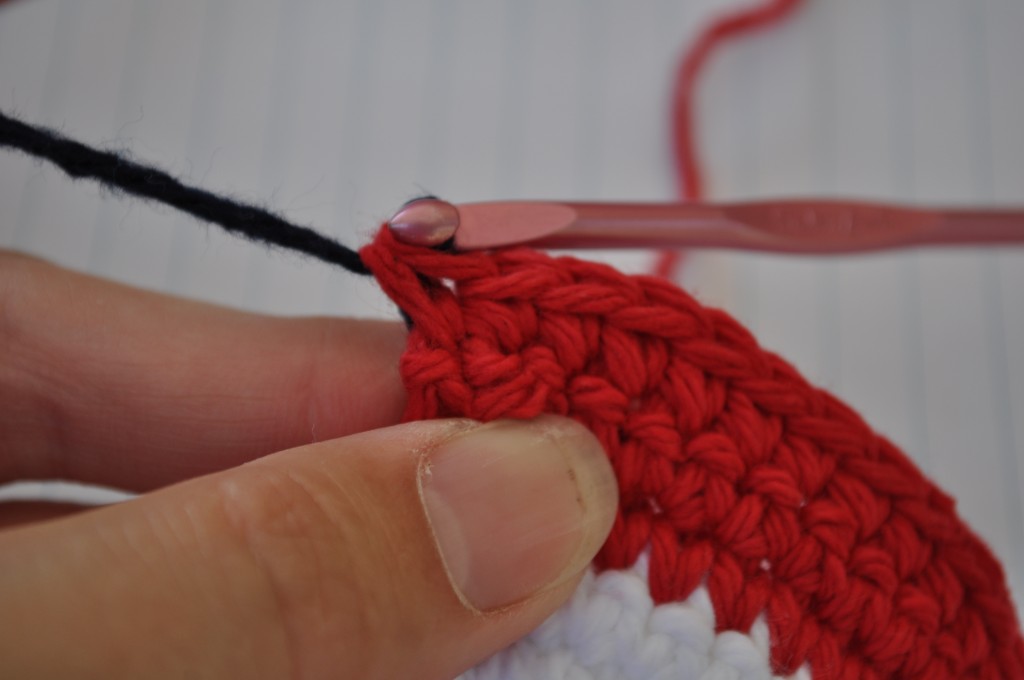
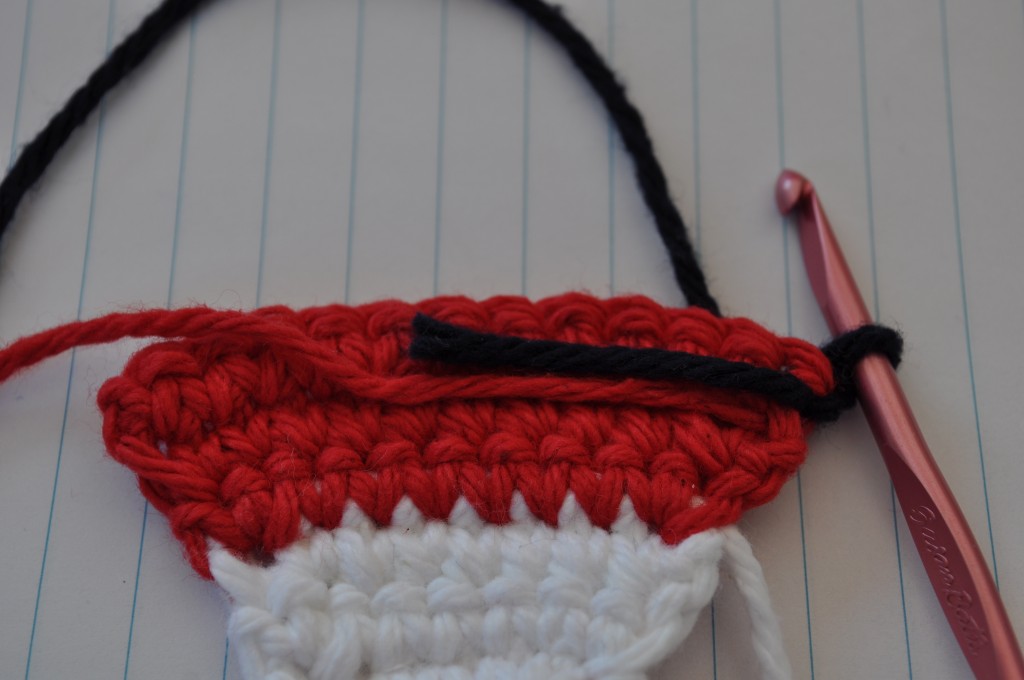
Once you’ve turned and are ready to begin the new row, line the tail of the old color and the tail of the new color up along the back of your work, parallel to the rows.

When you put your hook in next, make sure that you go under the two tails so that they will get trapped in the next stitch.

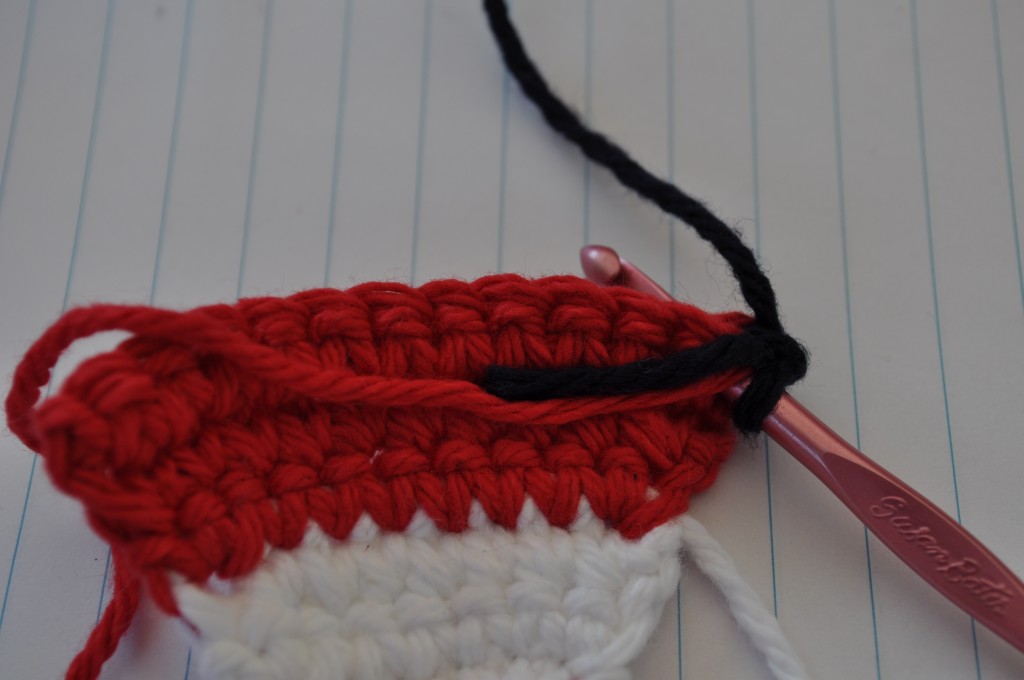
Continue with your row, trapping the tails inside your stitches until the ends of the tails or the end of your row.

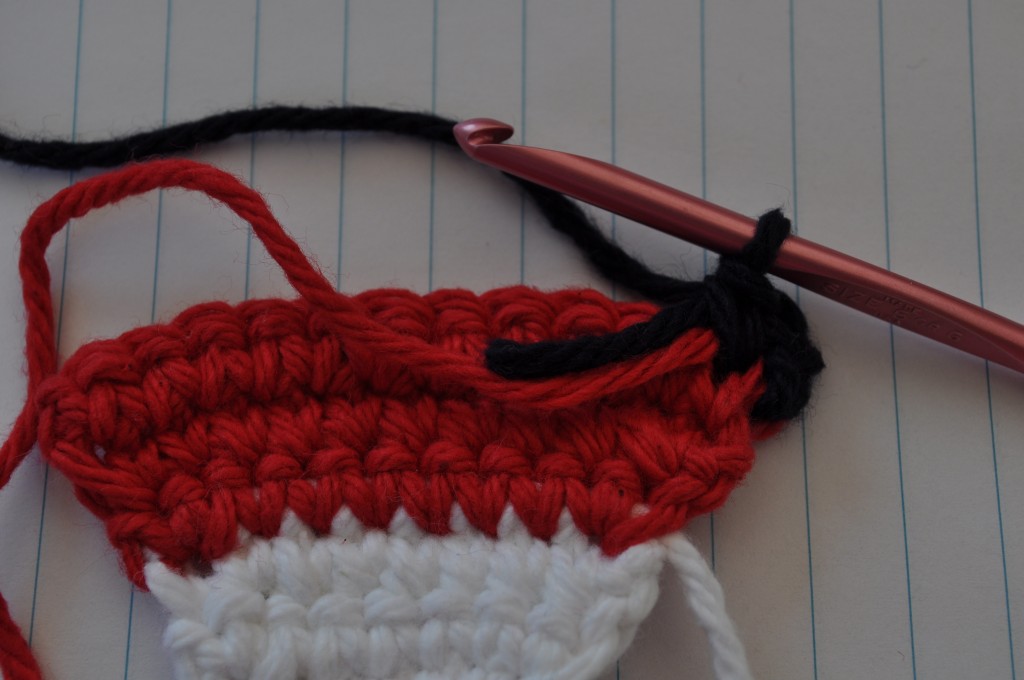
After you trim all your sticky-outy ends that you’ve already stitched over;

all you need to do is weave in your very last end.

Posted in Crafts | Leave a comment

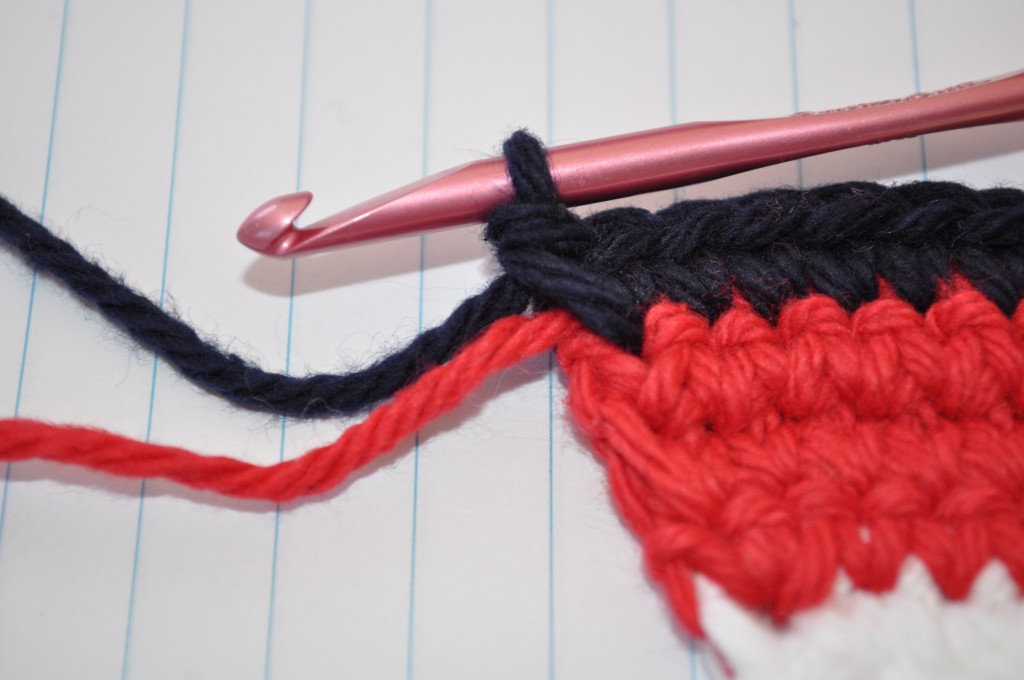
Changing Yarn Color in Crochet

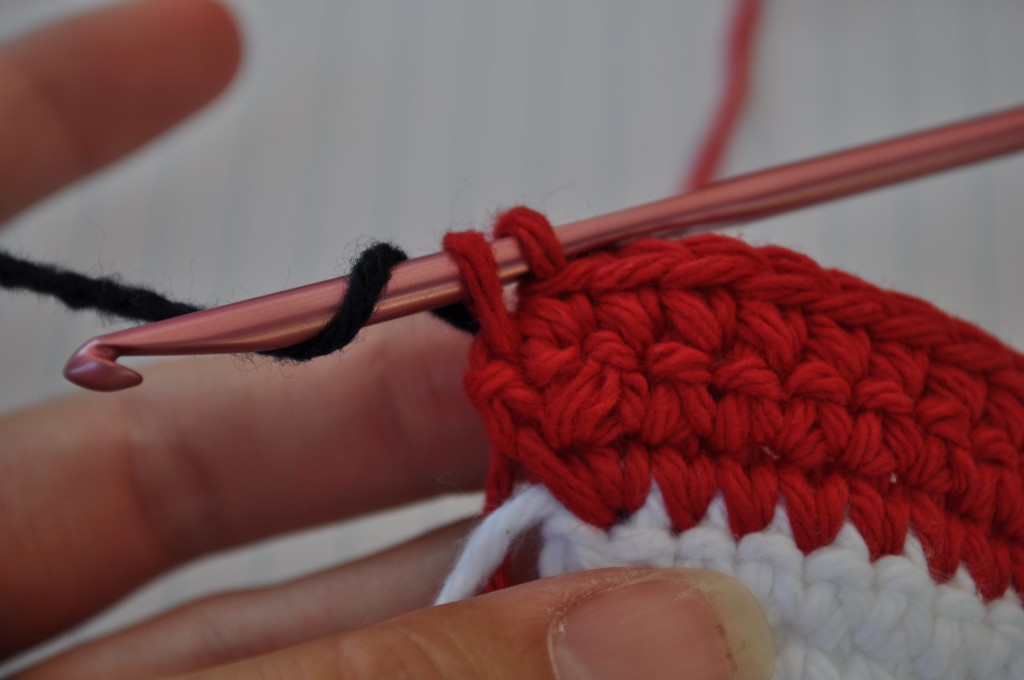
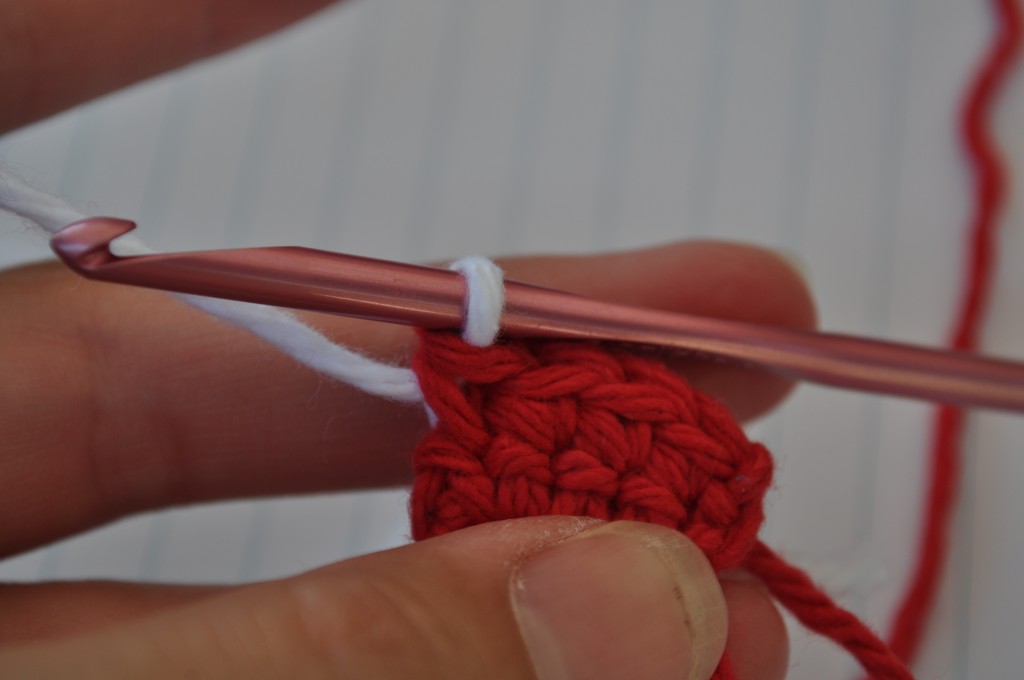
Here’s how I change yarn colors so as not to interrupt the clean line between two different colored rows or stitches. In this example, I’m making stripes so the last row is completely red and the new row will be completely white. (In my photos, I’m showing single crochet stitches.)

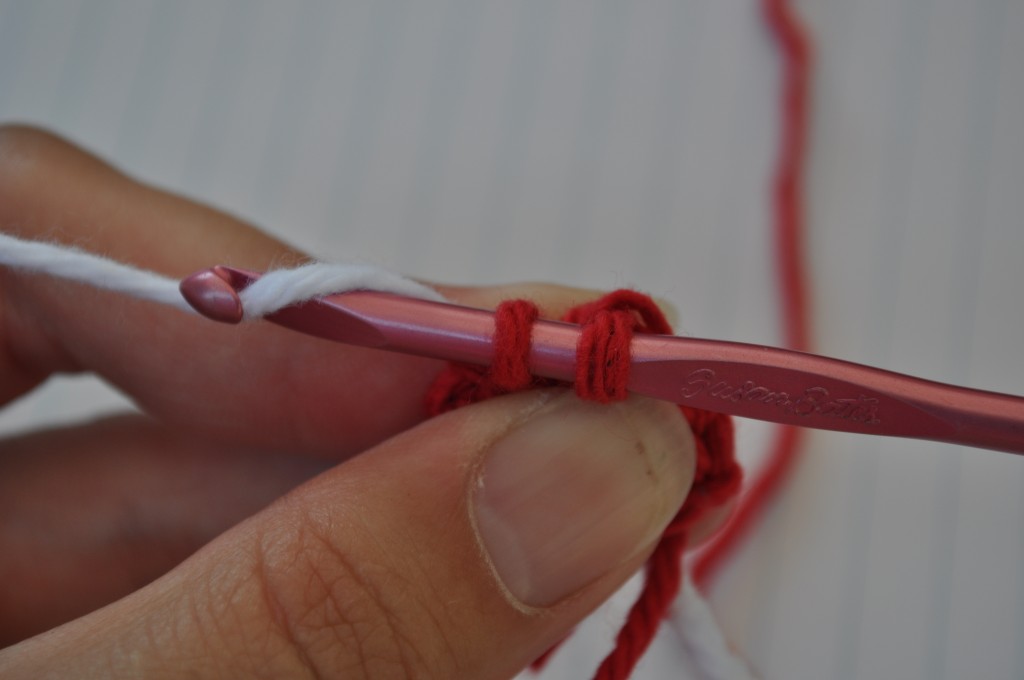
Begin making the last stitch before the color change, but don’t complete it. (In this case, the last stitch before the color change is the last stitch of the last red row.)

Just before you yarn over for the last time to pull through the last loops on your hook; drop the current yarn that you’re drawing from and pick up the new color yarn and yarn over with the new yarn.

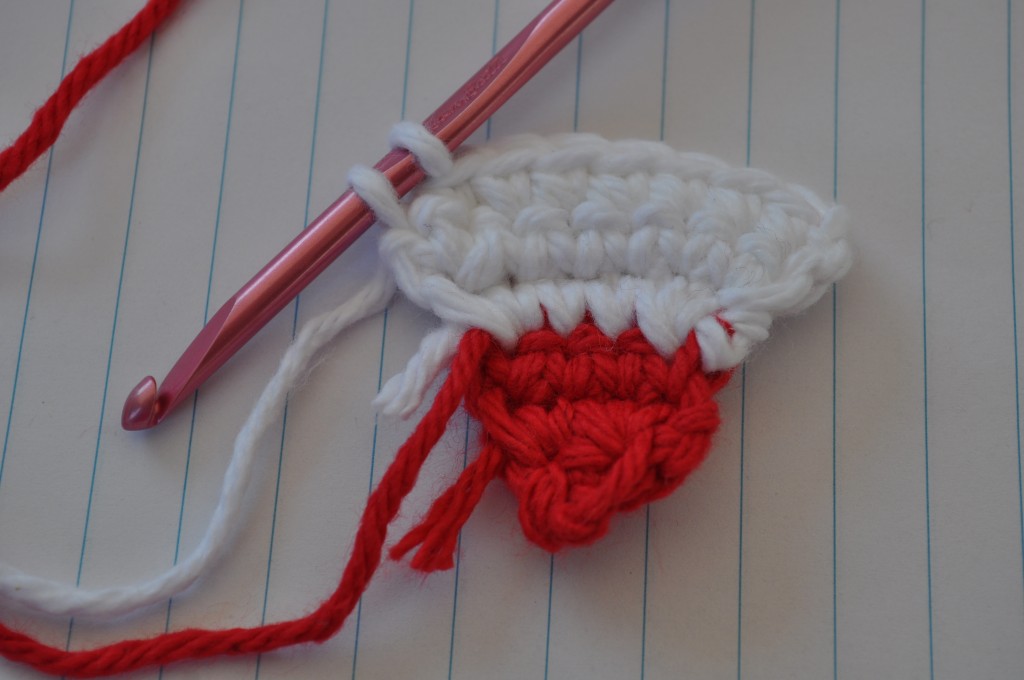
Pull the new color through the old color loops.

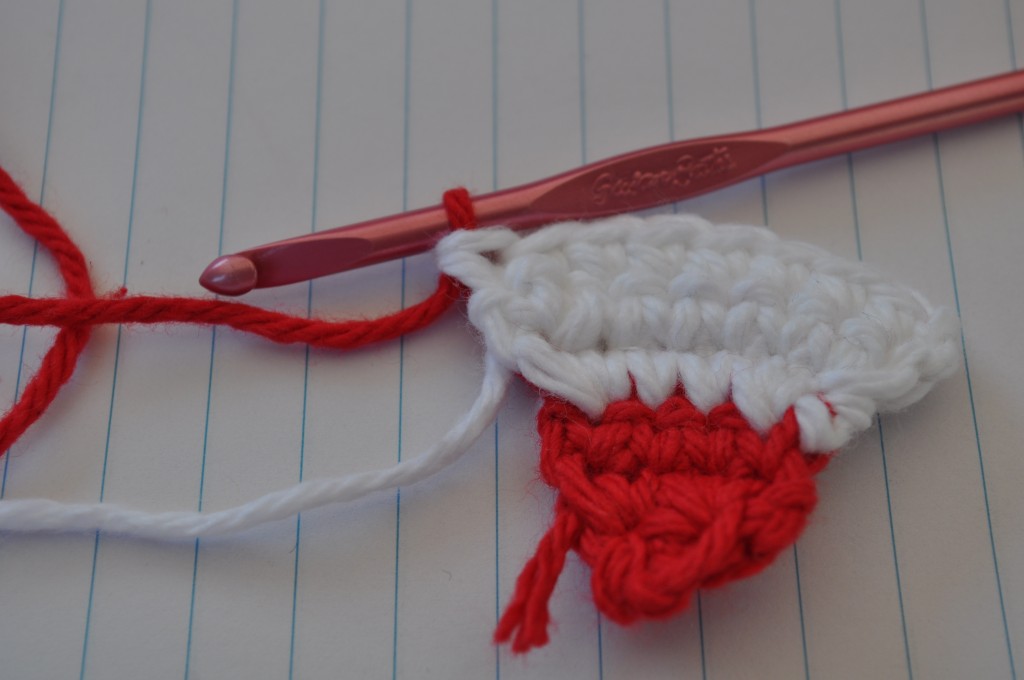
Here is the next color change…before

…and after

easy!

Posted in Crafts | Leave a comment

Sewing Buttons onto Finished Crochet

As you know, I crochet tons of stuff and I sew buttons to most all of it; mostly because buttons make everything better, right? Agreed. So, I wanted to show how I sew buttons onto my finished crochet projects because it’s not the same as sewing onto more solid fabrics and I’ve got a style to share that I’m really happy with. Hopefully it will come in handy for you too!

I usually use thread that matches my yarn so the thread does not show on the back of the project, but for this, I’m using a contrasting thread so it shows up in the photos.

Here goes… Thread your needle with a thread color that will blend with your yarn color, but don’t knot it. You don’t want to bother with knots because they will likely slip through a gap in the crochet.

On the back side of the project, slip your needle through a few of the crochet strands.
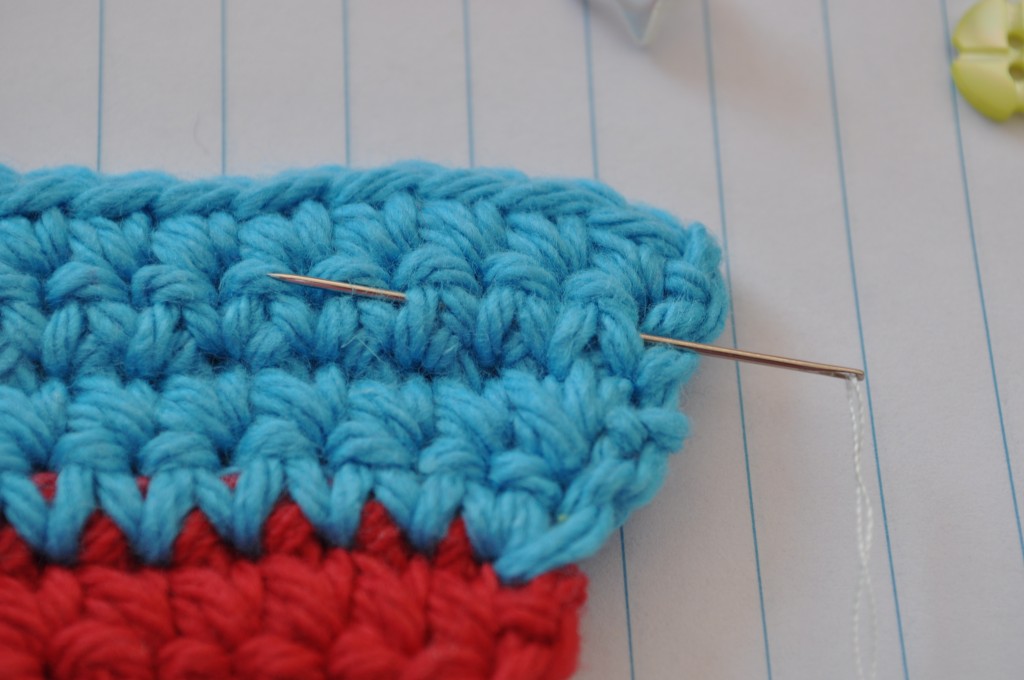
Pull the thread through until the tail is nearly gone.
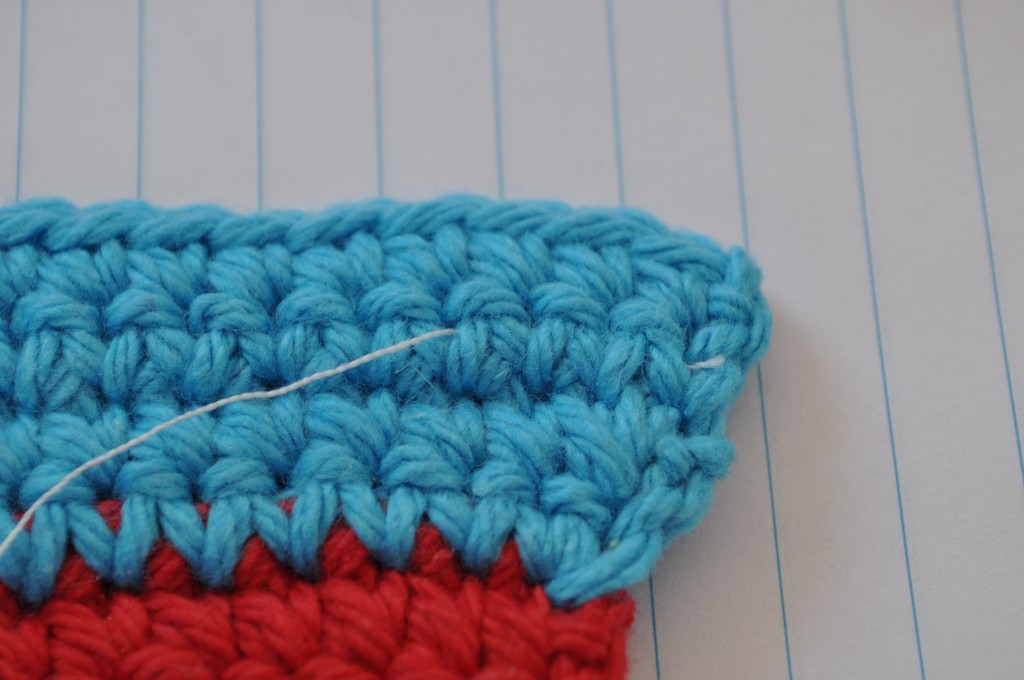
Now, you’re going to basically wrap the thread around a single strand of yarn a few times to secure it. So, slip your needle under the strand of yarn next to where your thread has emerged.
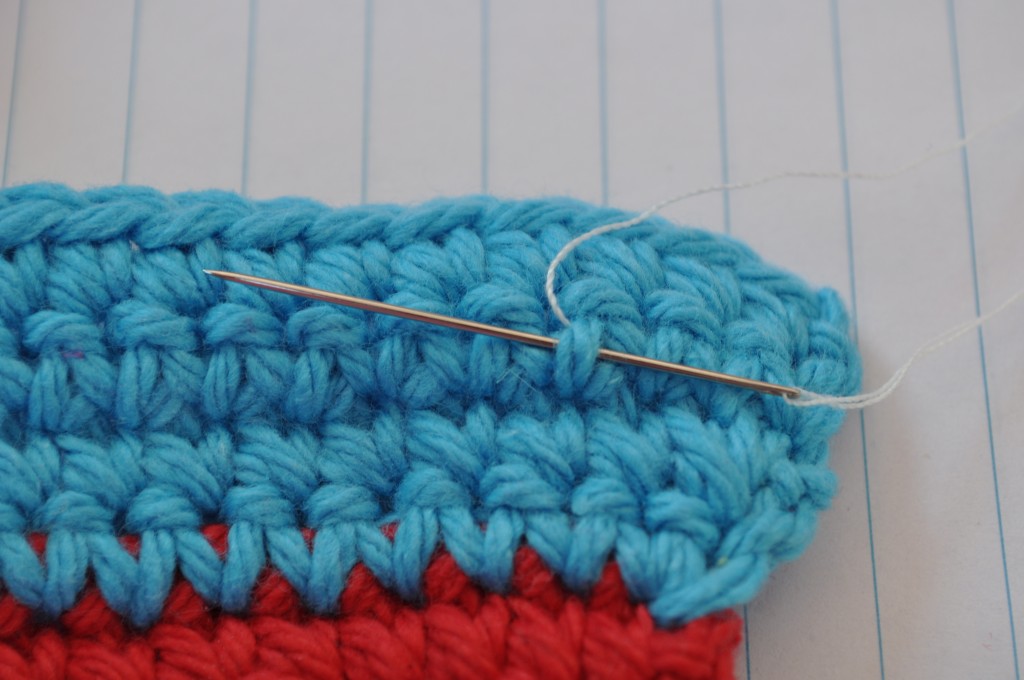
Then, slip your needle under that same strand again the same way and pull it tight.
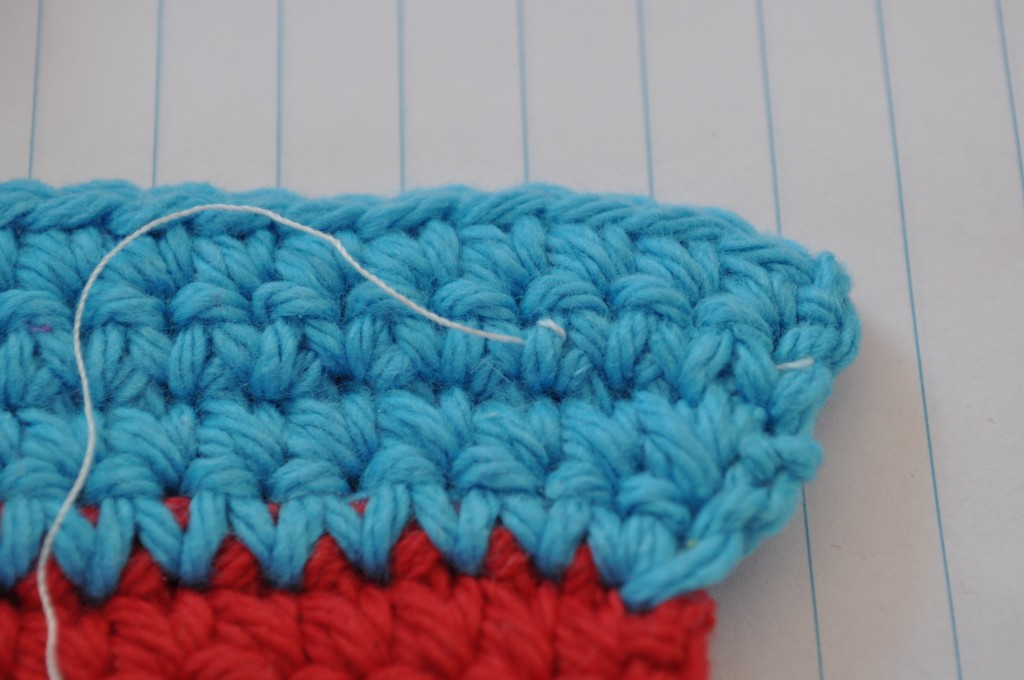
Now, do that a couple more times.
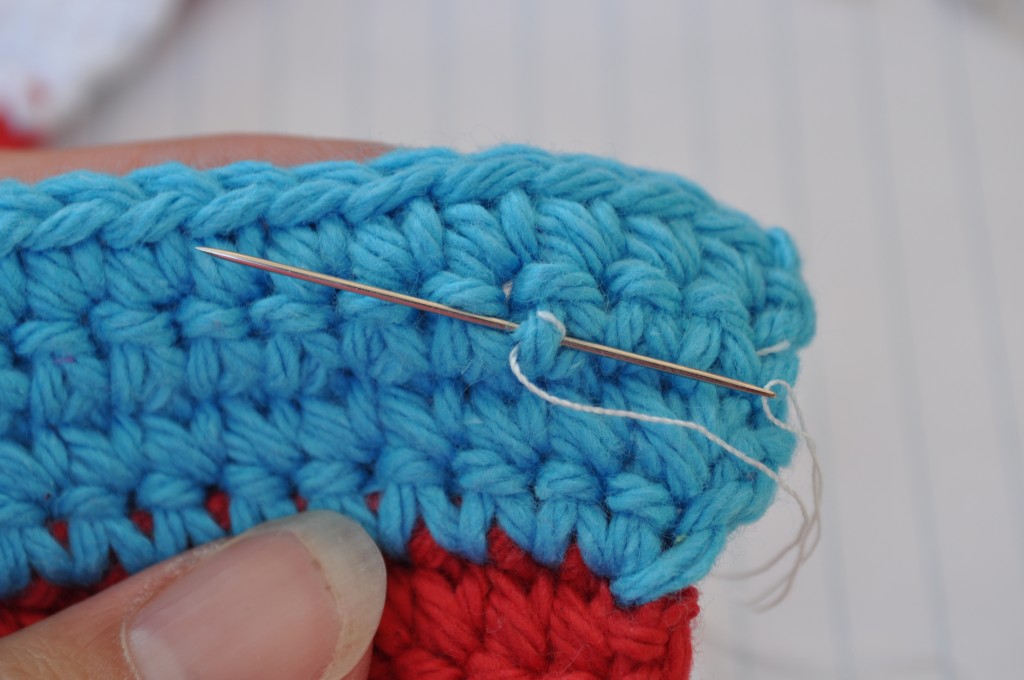
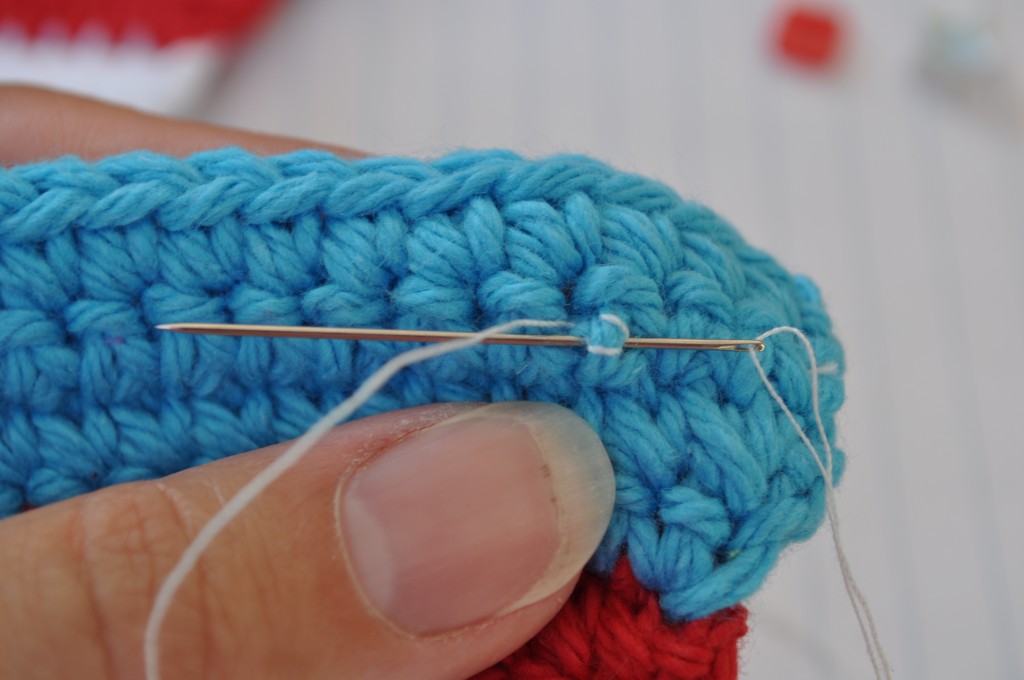
So, you’ve basically just made your knot and now your thread is secured. Put your needle through to the front at the location you want to sew your button.
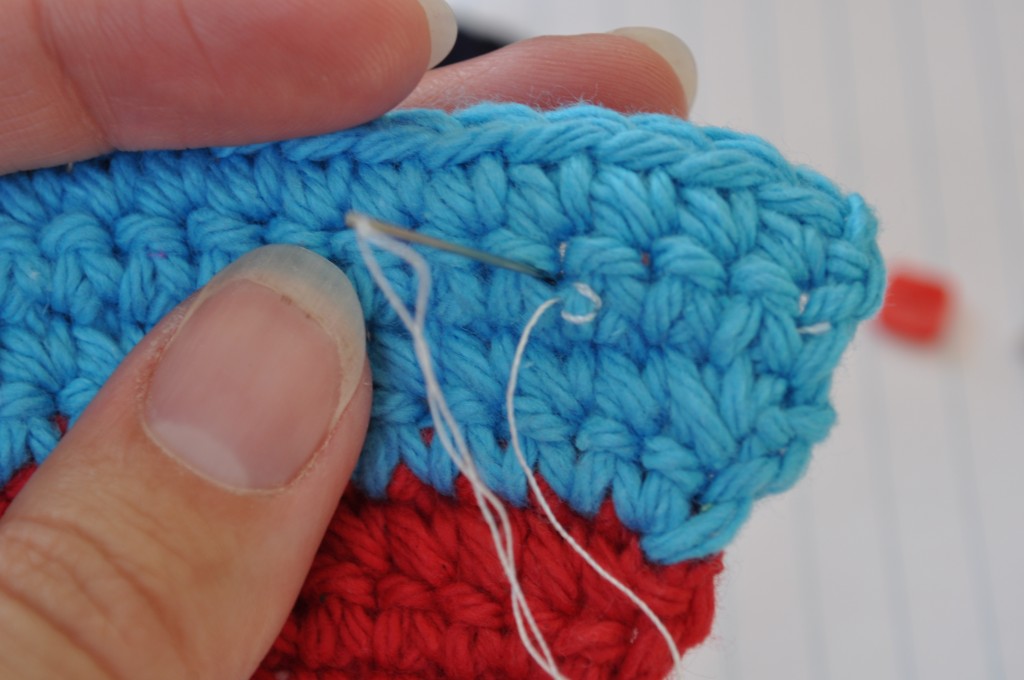
Put your button on your needle and proceed to sew it onto the project.
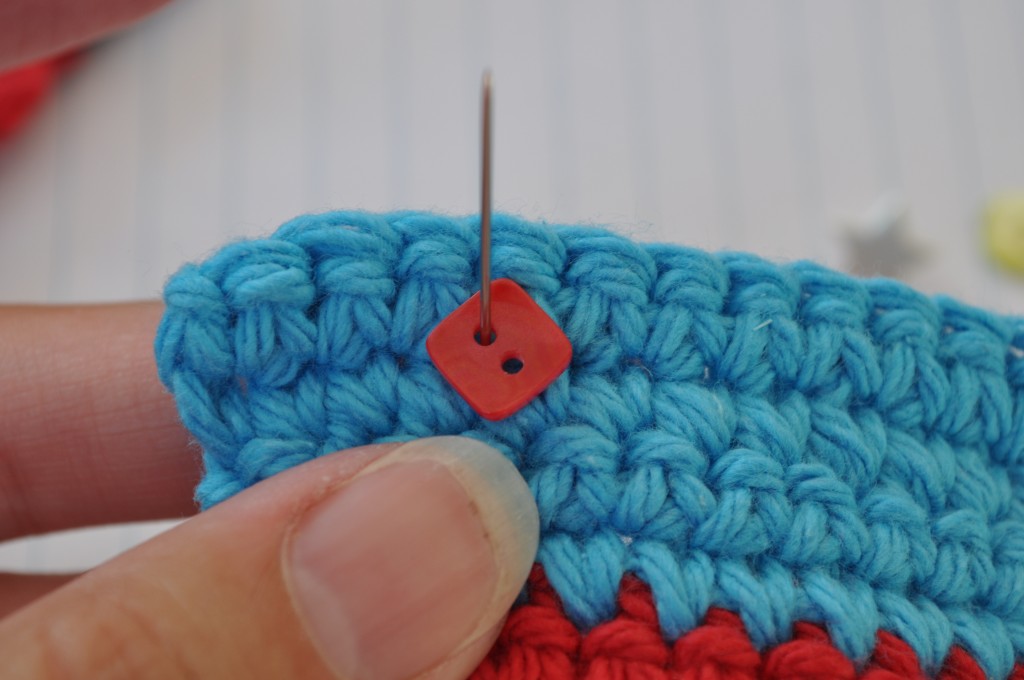
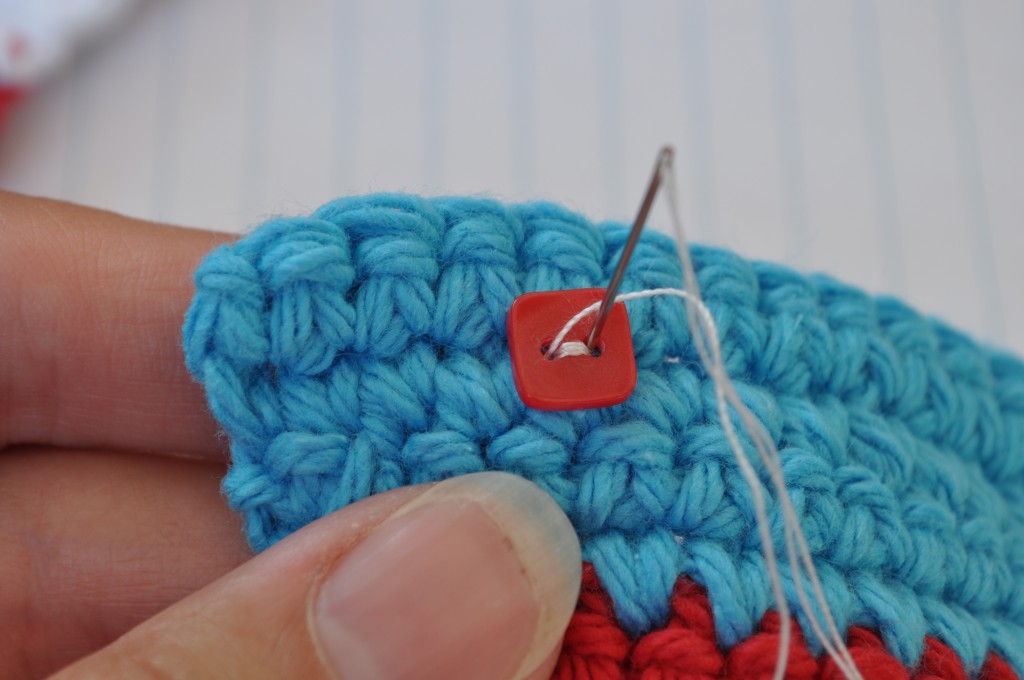
Finish with your needle at the back. Now, you can sew more buttons or finish off. If you’re sewing more buttons, you don’t have to start all over, simply slide your needle under some yarn strands until it’s in position for the next button and sew it on.
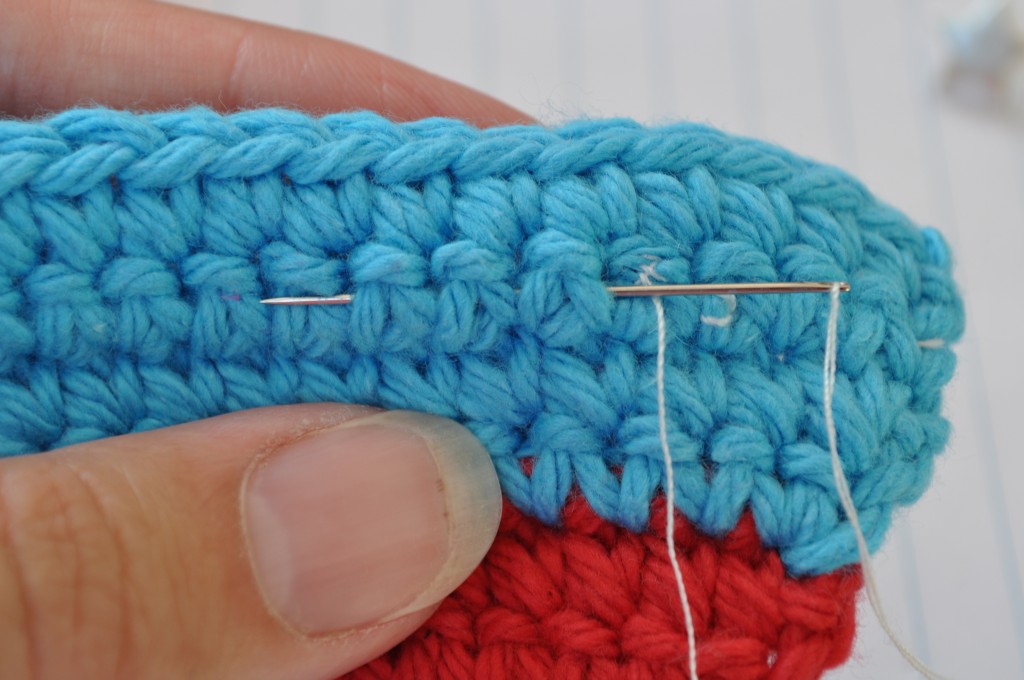
I’ll show how I like to finish off, but first, here’s how I like to sew buttons with a shank at the back onto crochet.

For this type of button, place it where you want it and push the shank through between two crochet stitches so the shank shows through at the back of the project. Slip your needle through the shank, picking up a strand of yarn on either side of the shank as well. All your work is done on the back of the project for this type of button.
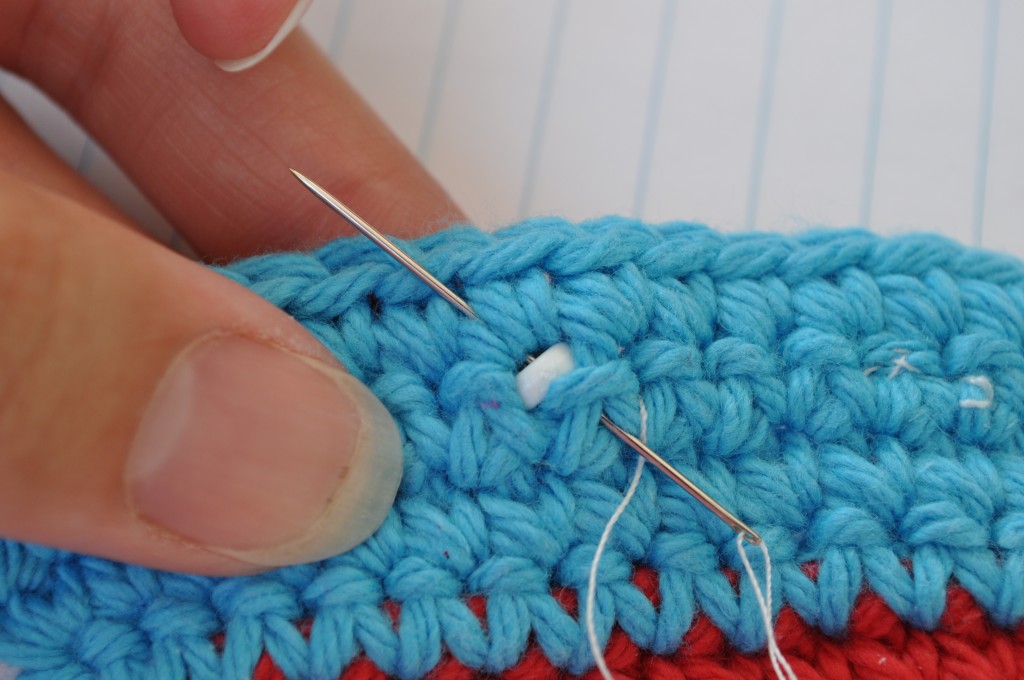
Take a few more stitches like this until your button is secure.
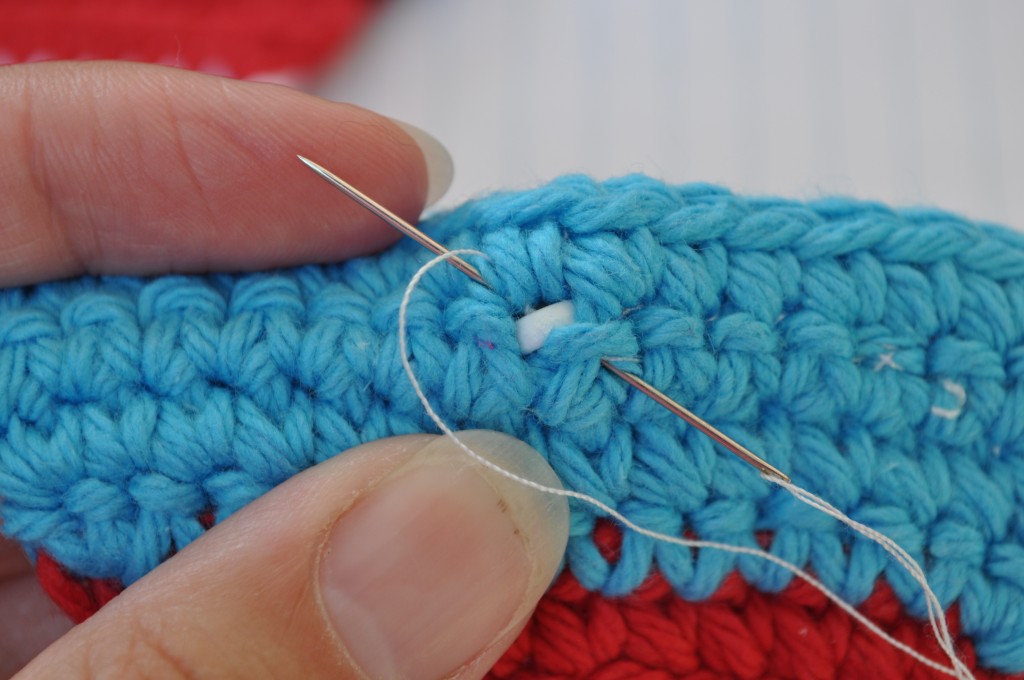
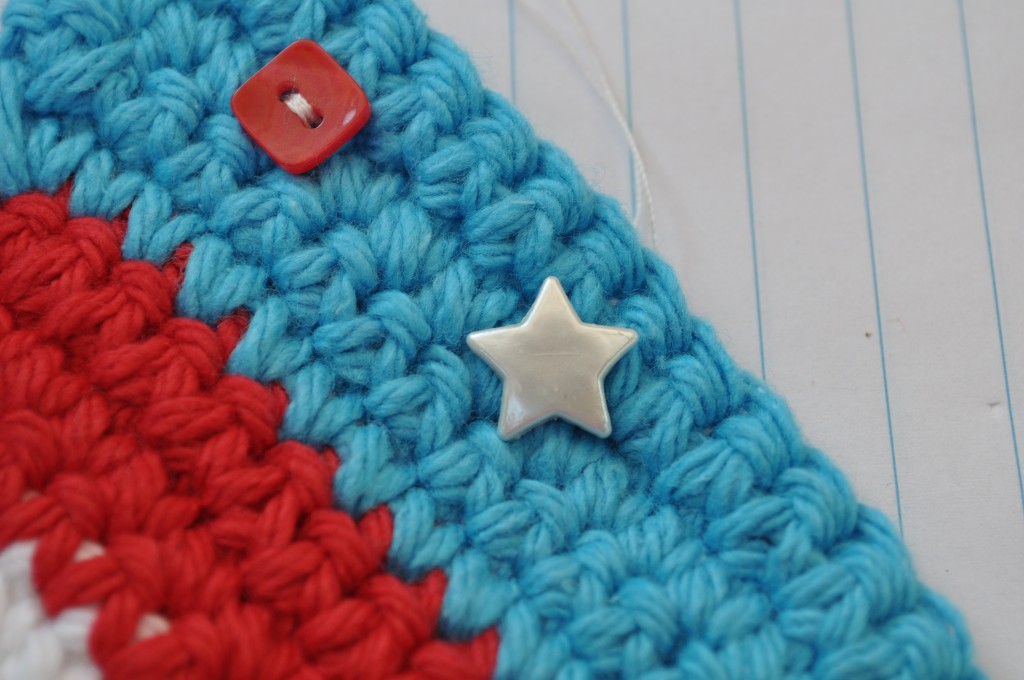
Now you’re ready to finish off. Loop the thread under a single yarn strand at the back of the crochet work.
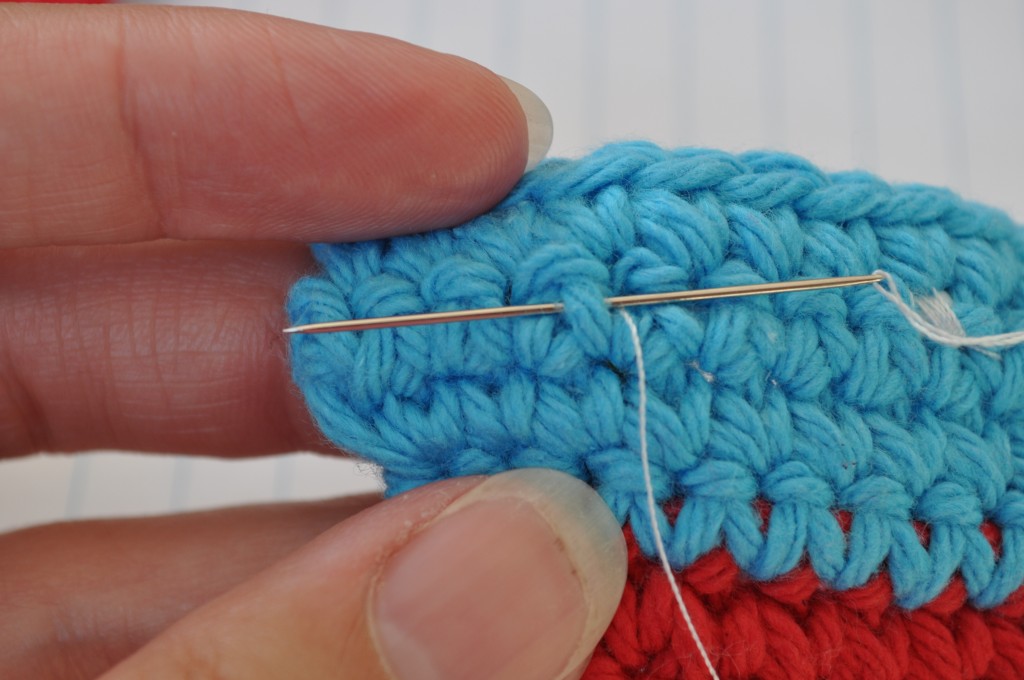
Loop it through a few more times.
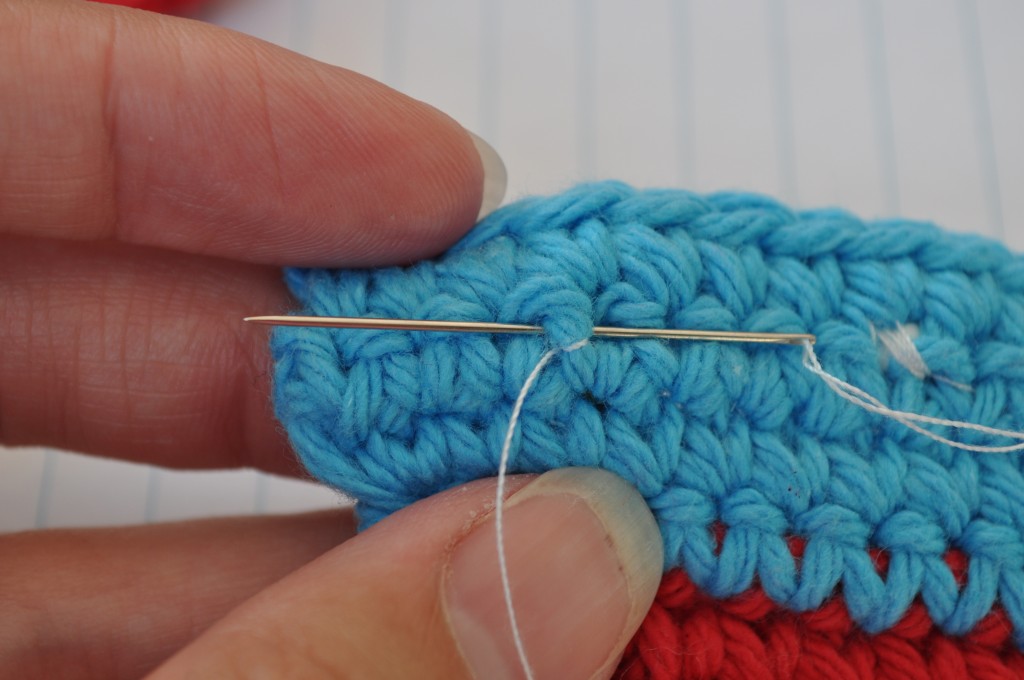
Then, slip your needle under a few strands of yarn and pull snug.
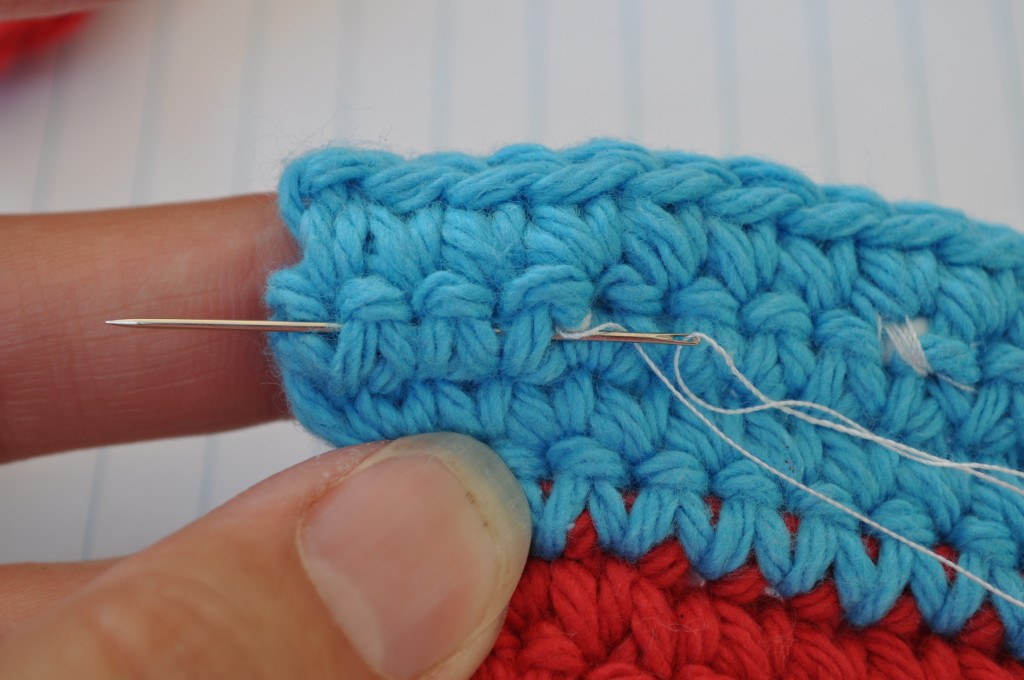
Then, snip your thread.
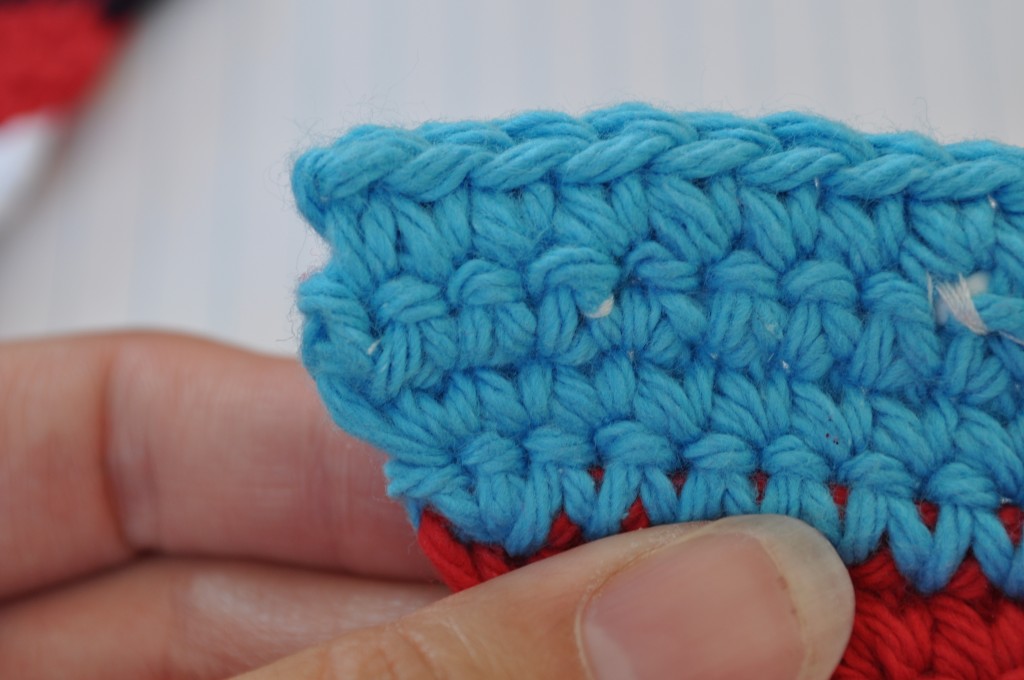
You’re done and your buttons and thread ends are secure and hidden.

Posted in Crafts, Crochet, How-To's | 6 Comments

July 4th Pennant Bunting Crochet Pattern

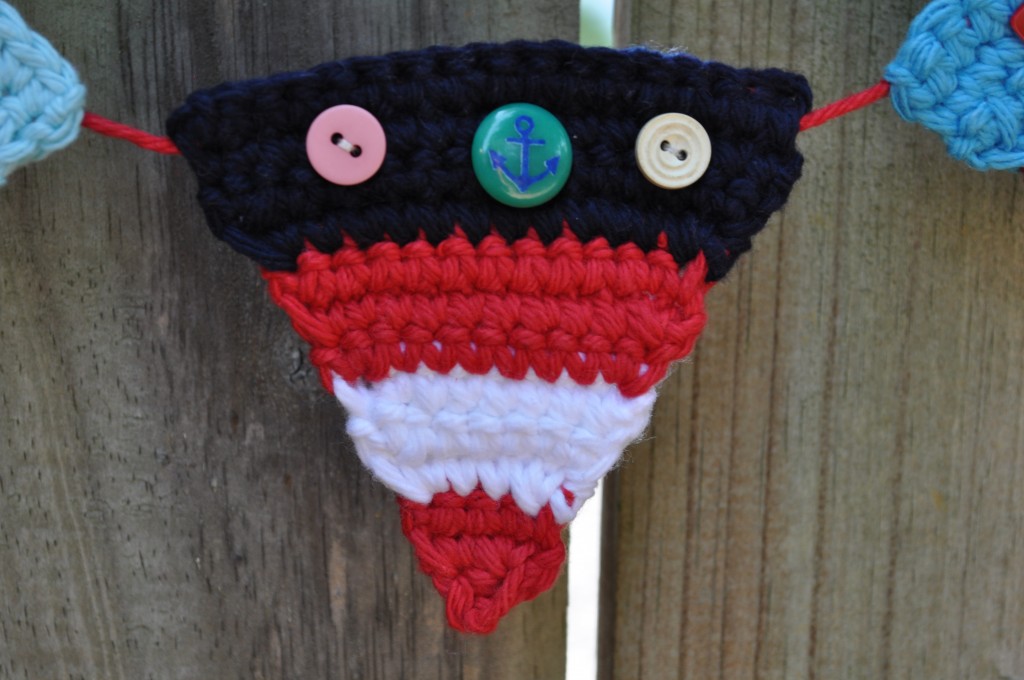
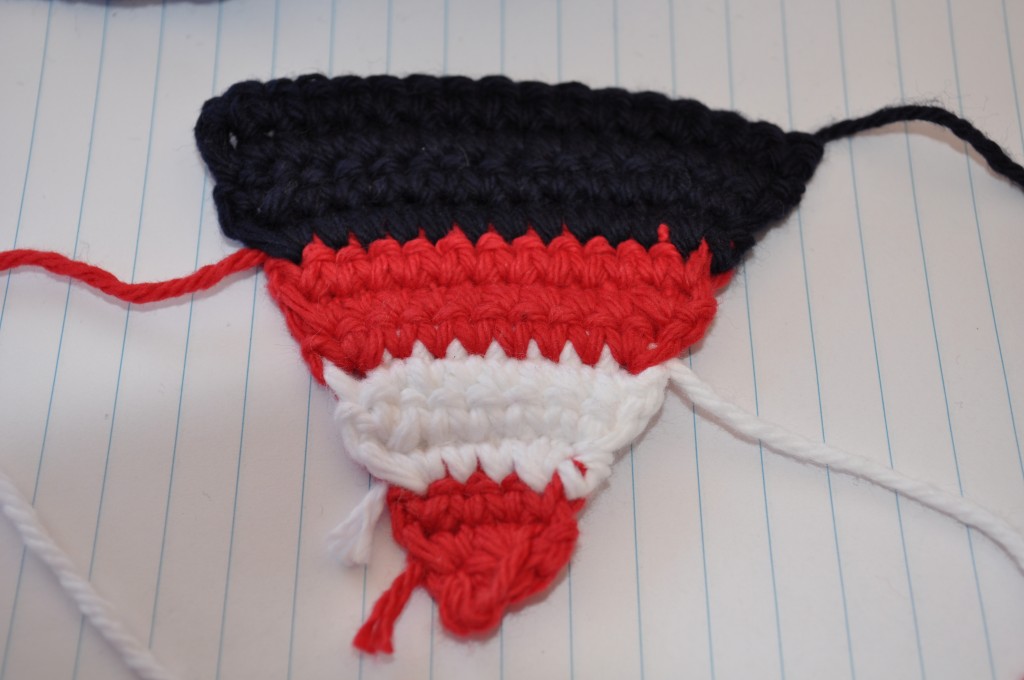
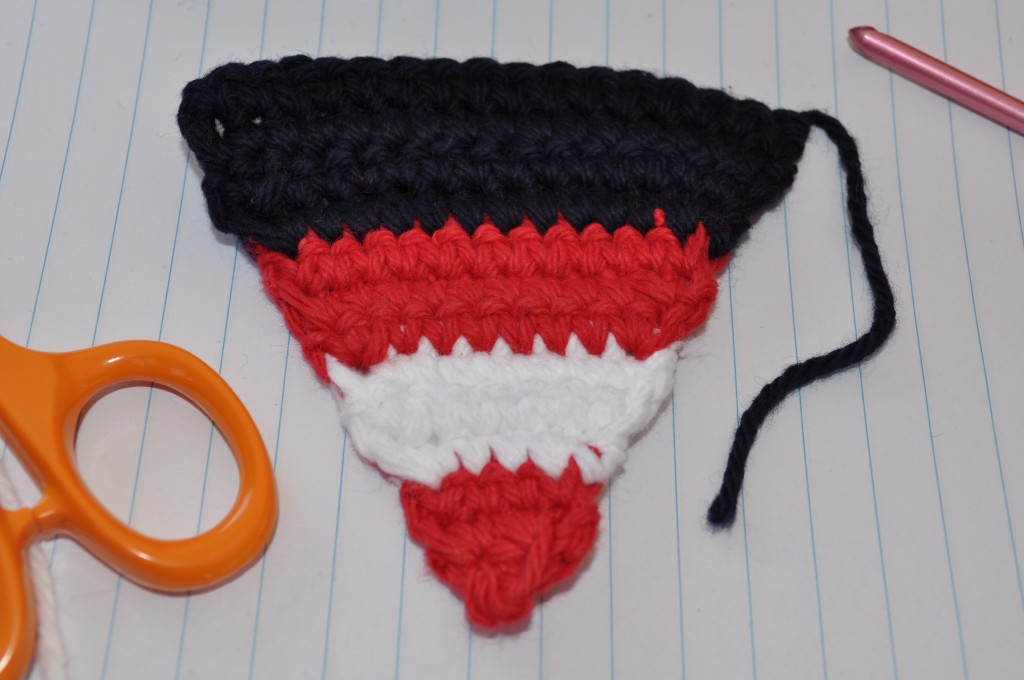
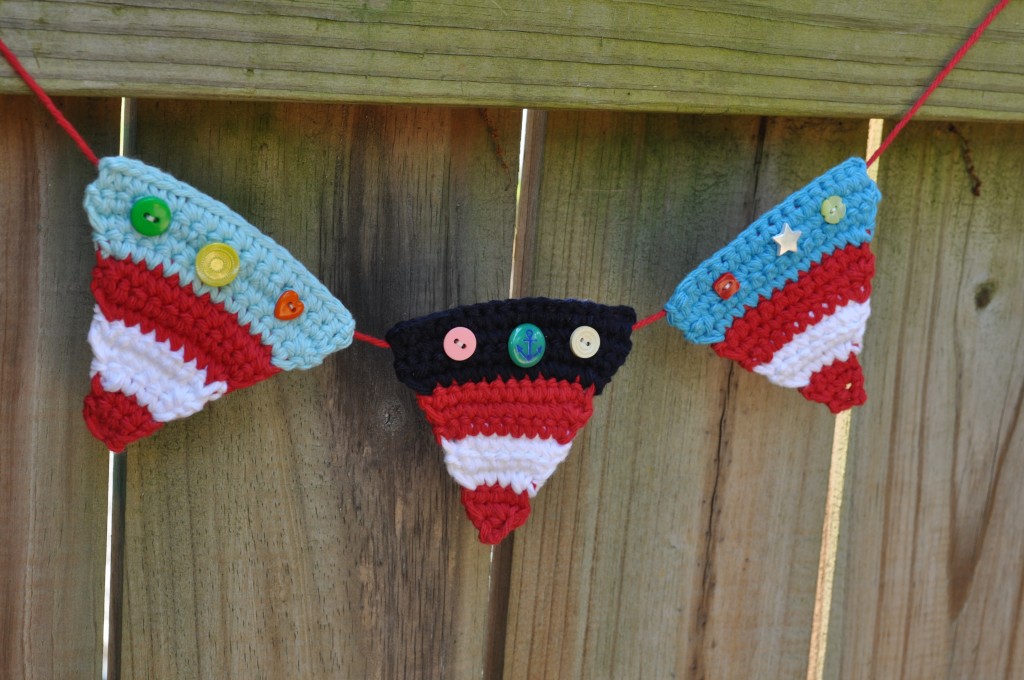
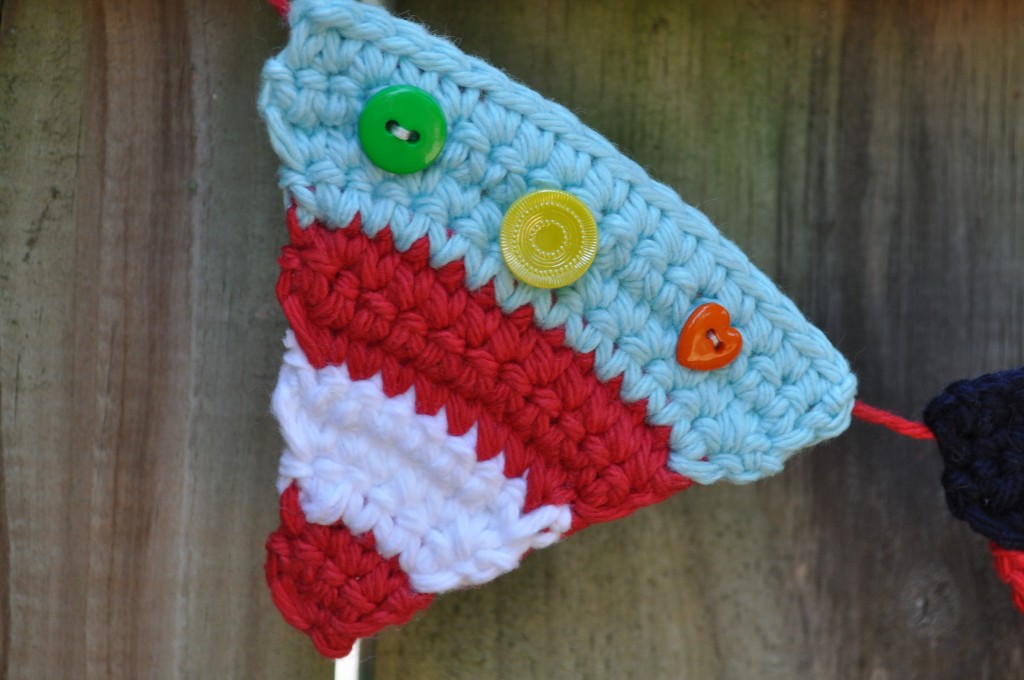
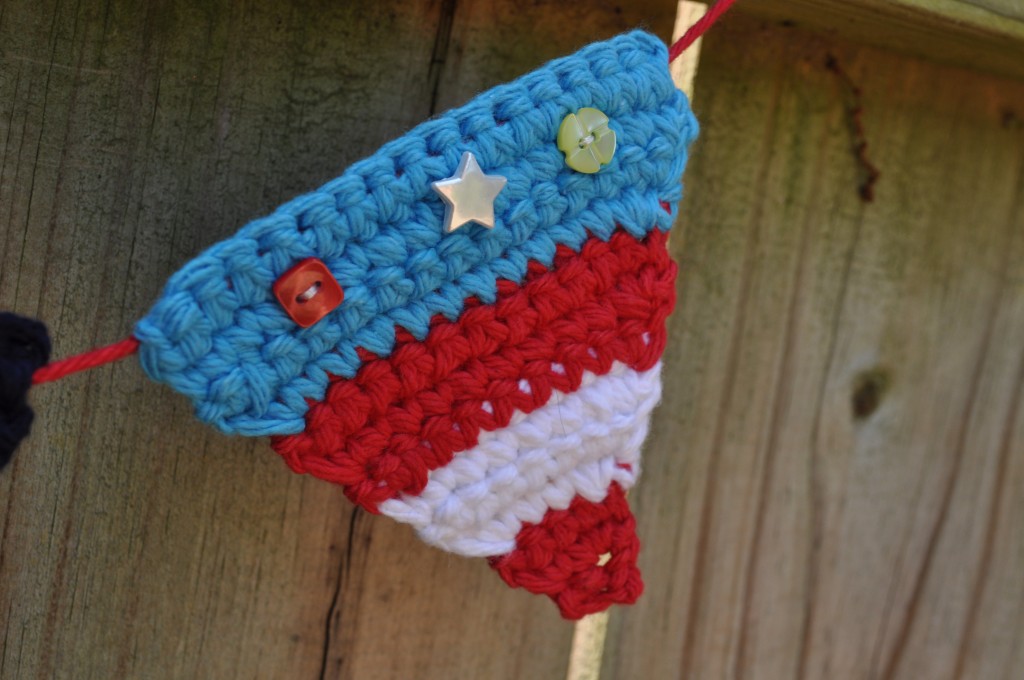
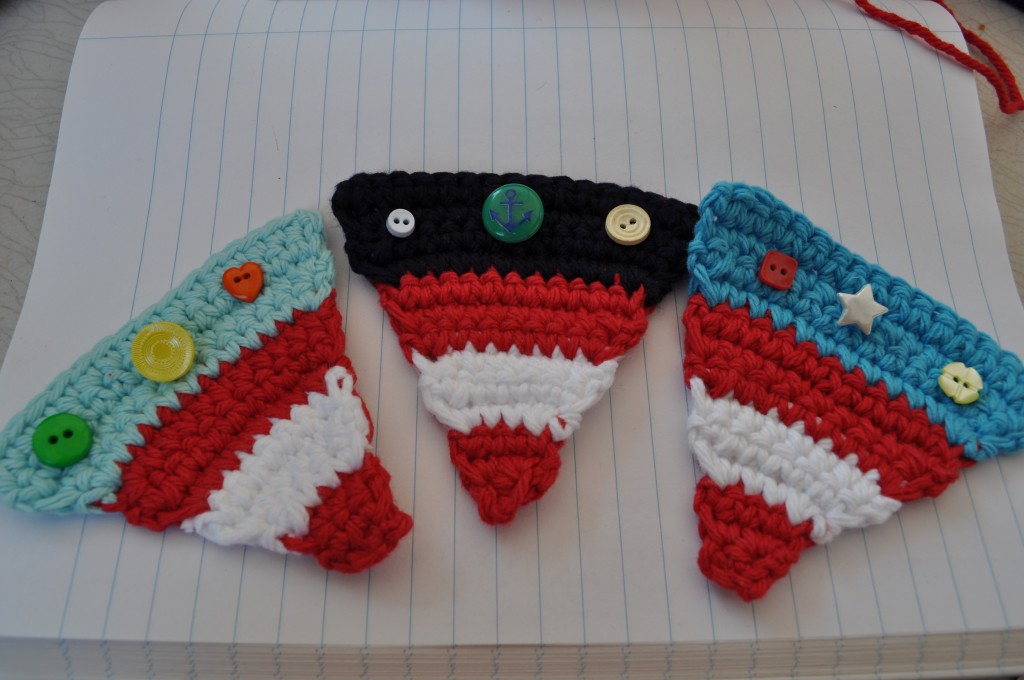
How cute are these little Fourth of July pennants?

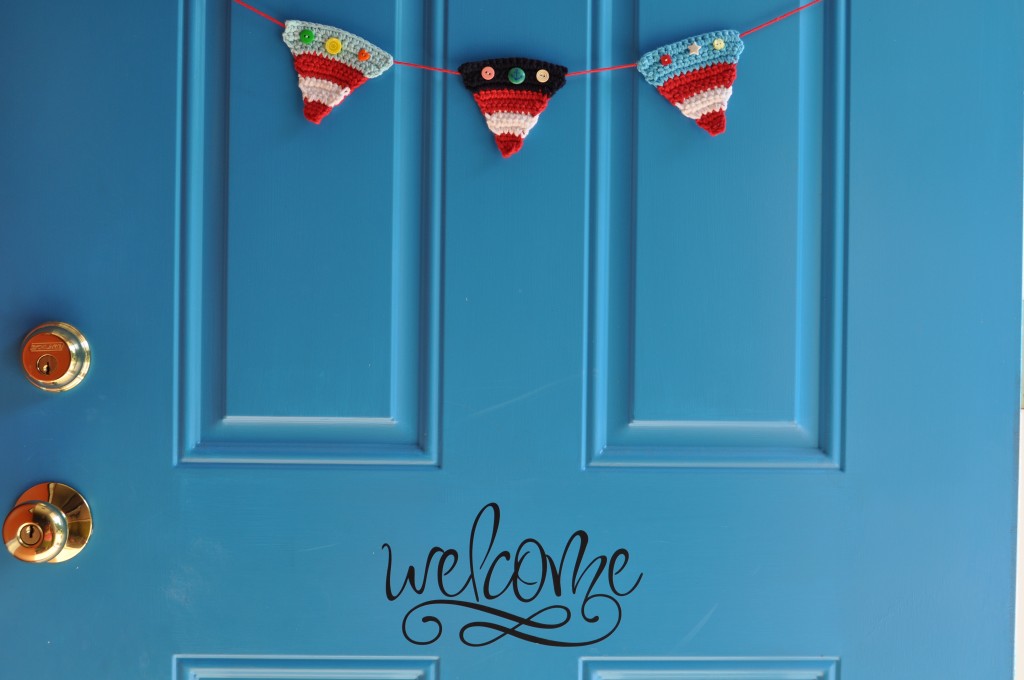
I made them up today for a quick and easy (and cute) front door decoration for the 4th. They would be so cute across a little mirror or window too.

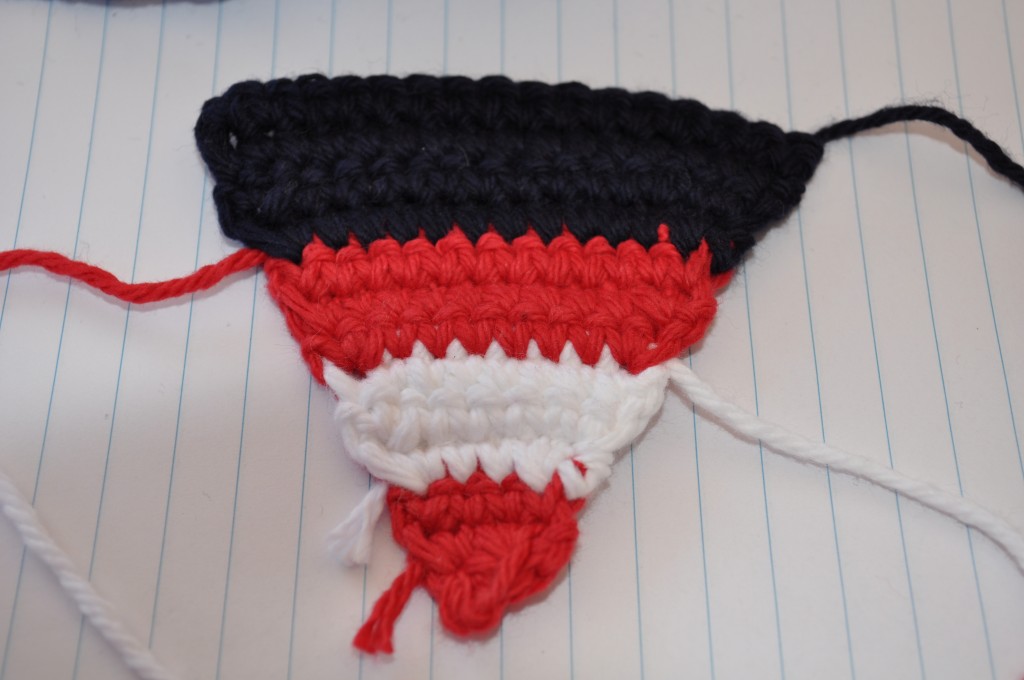
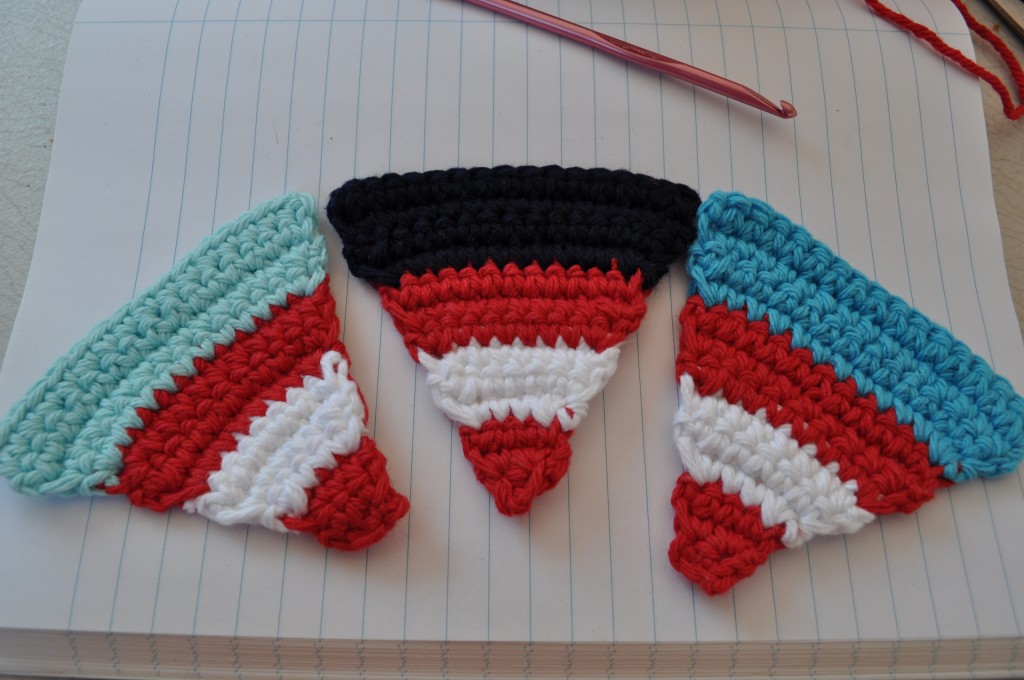
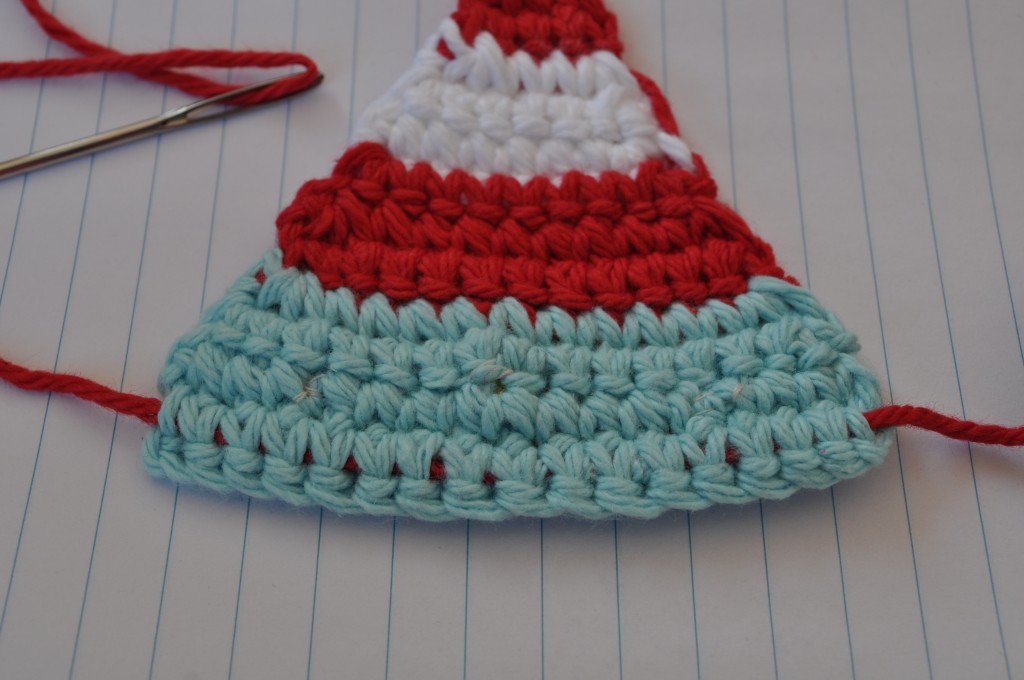
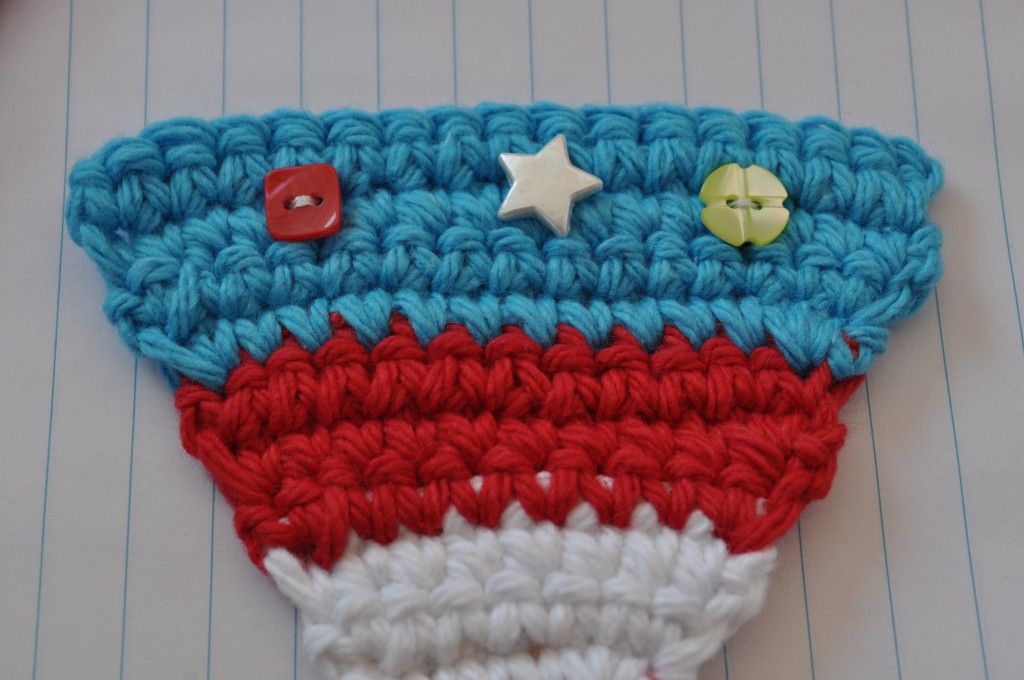
I used a true red and white for the stripes and then changed up the blues because I’m simply not down with matchy-matchy. I think my favorite is the turquoise (I used robin’s egg and navy as well). I also made sure to stitch over the ends as I went so I wouldn’t have to weave them all in at the end. I was planning on using only white buttons across the tops, but when it came time to throw down (like actually arrange the buttons on the pennants to see how I liked the look), I decided to just go crazy. Button crazy. I’m serious.

Here’s my crochet pattern for a simple and sweet Independence Day decoration:

This pattern is worked all in single crochet; chaining one before turning at the end of each row. Using a U.S. size ‘G’ hook and red cotton worsted weight yarn;
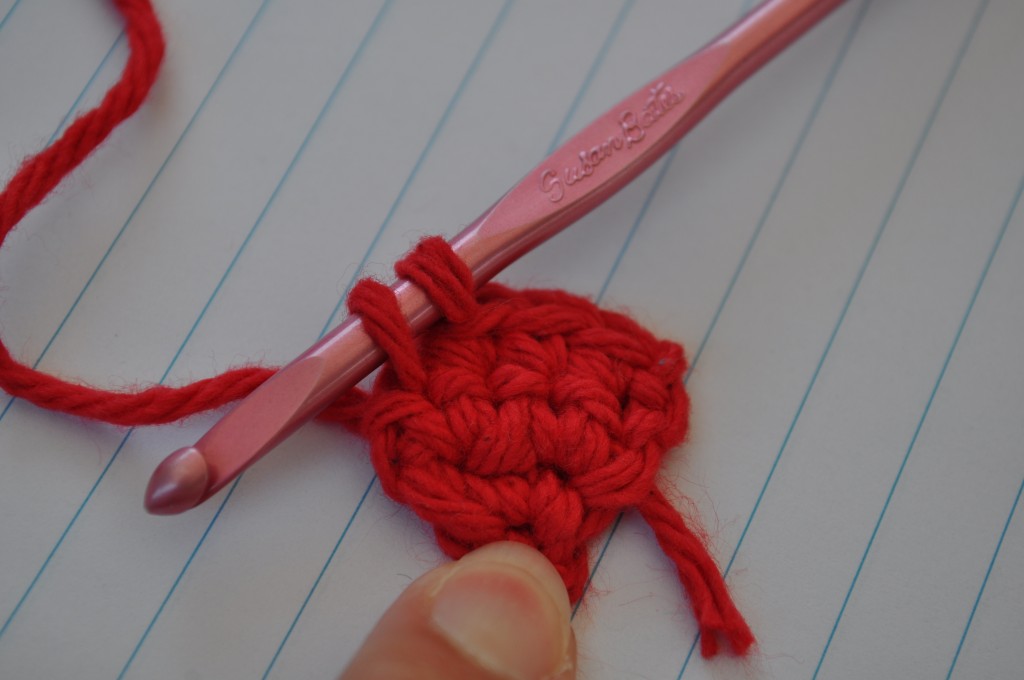
Chain 2
Row 1: 2 sc in 2nd ch from hook (2 sts)
Row 2: 2 sc in ea st (4 sts)
Row 3: 1 sc in ea st across (4 sts)
Change to white yarn
Row 4: 2 sc in first st; 1 sc in next 2 sts; 2 sc in last st (6 sts)
Row 5: 2 sc in first st; 1 sc in next 4 sts; 2 sc in last st (8 sts)
Row 6: 1 sc in ea st across (8 sts)
Change to red yarn
Row 7: 2 sc in first st; 1 sc in next 6 sts; 2 sc in last st (10 sts)
Row 8: 2 sc in first st; 1 sc in next 8 sts: 2 sc in last st (12 sts)
Row 9: 1 sc in ea st across (12 sts)
Change to blue yarn
Row 10: 2 sc in first st; 1 sc in next 10 sts; 2 sc in last st (14 sts)
Row 11: 2 sc in first st; 1 sc in next 12 sts; 2 sc in last st (16 sts)
Row 12: 1 sc in ea st across (16 sts)
Row 13: 1 sc in ea st across (16 sts)
Fasten off.

Make three (or as many as you want).

Then sew on the buttons. (Ha! Fooled you! They’re not even really sewn on in this picture. Man, I’m good at tricking people.)

String the pennants up on a single piece of yarn.
Hang and enjoy!

Posted in Crochet, Holiday | Leave a comment

Sewing and sewing

Beware, this is an iPhone post with only phone pics… So, after a good solid year of hardcore crochet, I am now in the midst of a long awaited sewing frenzy that began recently with finishing these…

20120601-184558.jpg

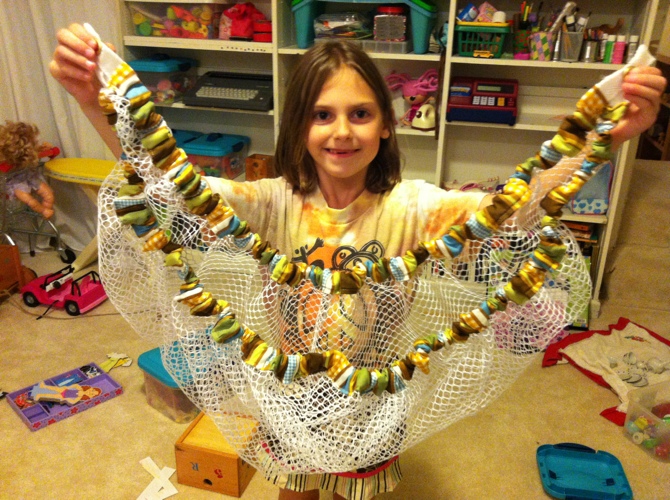
And continued with some nursery decor things i made up for a friend’s baby last week for which I am sans pictures. Except for one… If you ever end up with a huge stuffed animal net that was designed to fit in a corner, but what you really wanted was a cute small one that will work with just two hooks instead of three; simply cut a small opening in the casing and insert elastic all the way around. Once you’ve gathered it up to the size you want and secured the elastic into one big loop within the casing, cover the casing with cute fabric. The one I did was a huge triangle, but ended up like a more manageable size hammock and I was able to leave two of the original grommets exposed for easy hanging. (Wow, enough about that.)
20120601-185040.jpg

That fabric matches the valences I made for the nursery. And yes, that is the messy combination sewing and play room which is seemingly still working out.

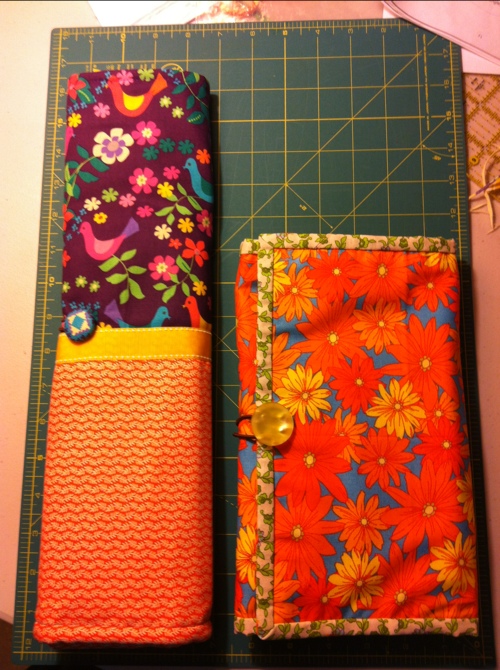
The sewing continued with two knitting needle cases in two days. One was an experiment (thank god) and the other, a gift for a friend…

20120601-194811.jpg

As I’m sewing up these small, simple, satisfying projects; I have to wonder…what in the world was I waiting for???

I’m reminded how fast sewing is (but actually not really that fast when there’s washing of fabric and straightening and cutting and arranging all taking place before the actual sewing; but still).

Suddenly, I have about a million projects on a running list (what’s new, right?). And part of the reason is because I have some relatively new and some long lost/recently found friends who are sewing right along with me, which is really cool.

Plus, there are like a billion wonderful patterns and ideas for sewing out there. I’ve got a whole new batch of books from the library too 🙂

Here are some things I’ve worked on this week, specifically in preparation for school being out soon.

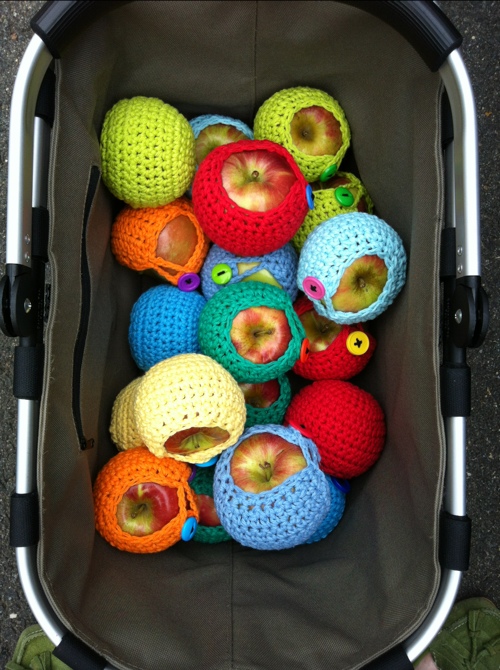
Apple jackets for the whole kindergarten class…

20120601-182718.jpg

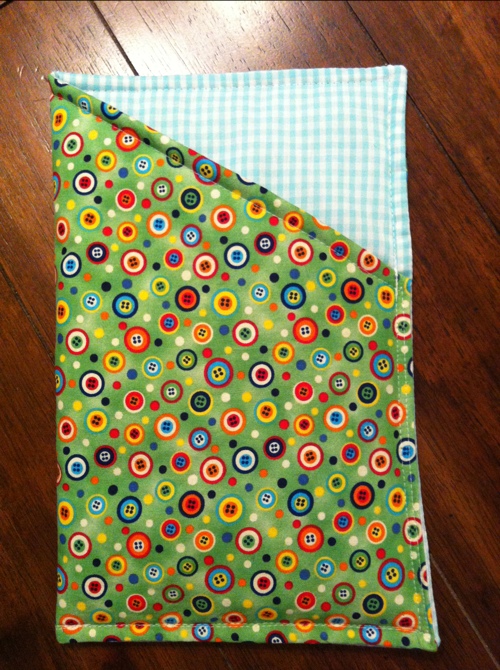
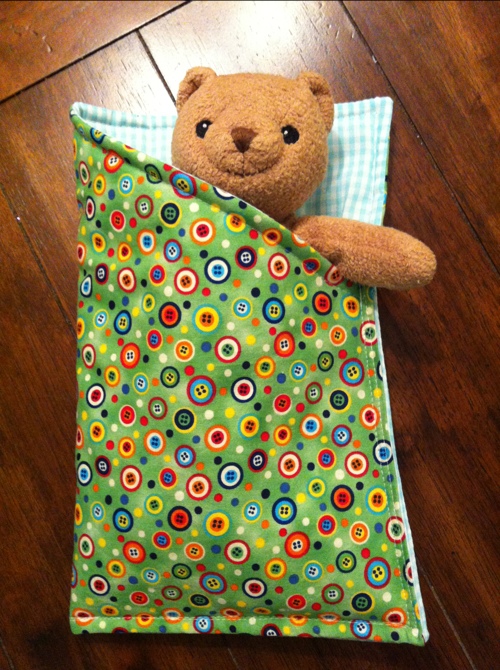
A new sleeping bag for the kindergarten class bear who has a sleepover with each of the kids throughout the year…

20120601-182939.jpg

20120601-182957.jpg

Here is what I’m working on for the kindergarten teacher gift…

20120601-183133.jpg

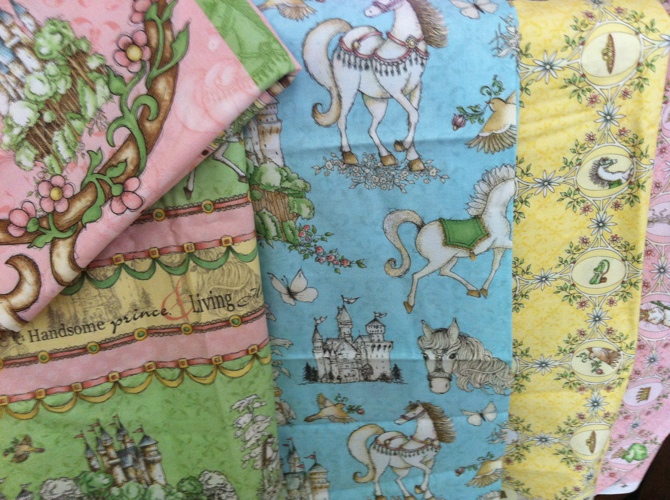
Next, I’ll be whipping up some girly bathroom accessories (including a shower curtain!) out of all this…

20120601-195149.jpg

Anyway…happy sewing!

Posted in Sewing | 1 Comment

Super Awesome Knitting Needle Organizer

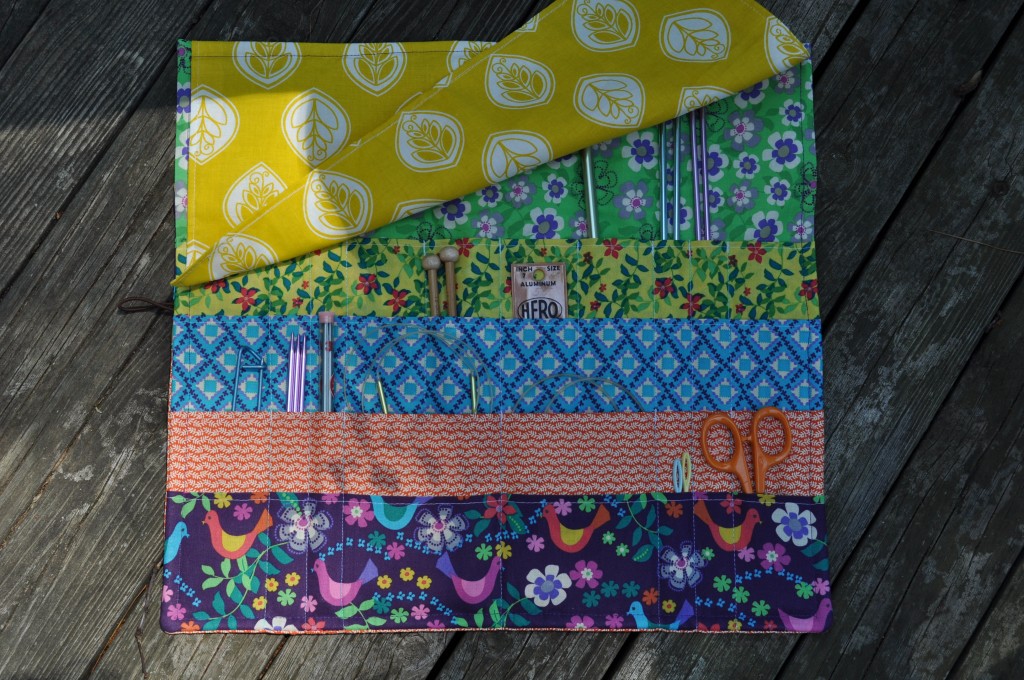
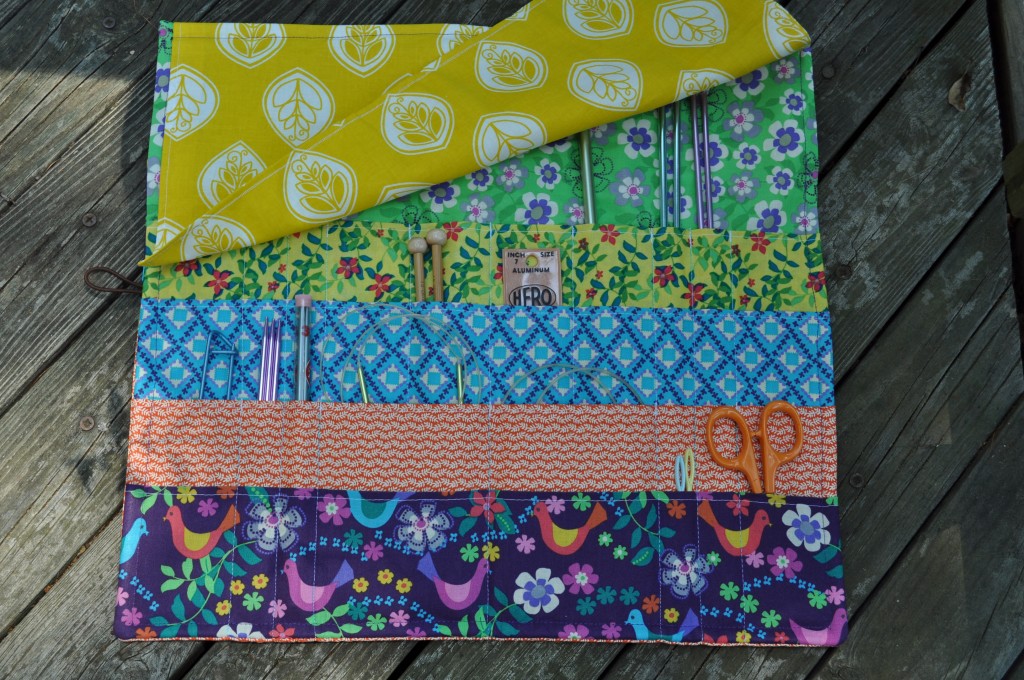
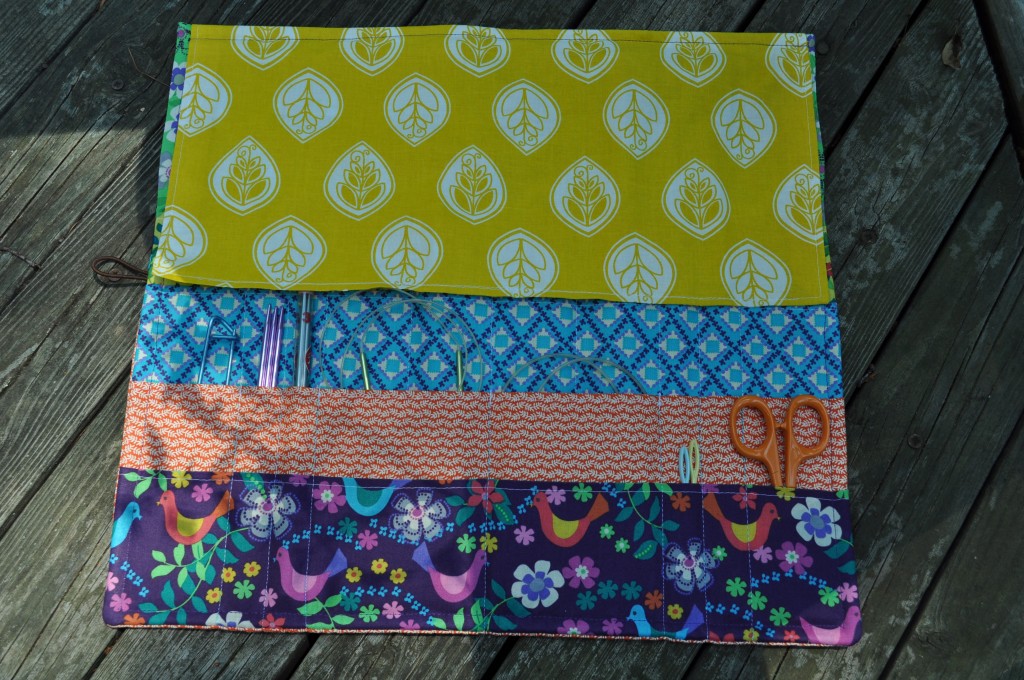
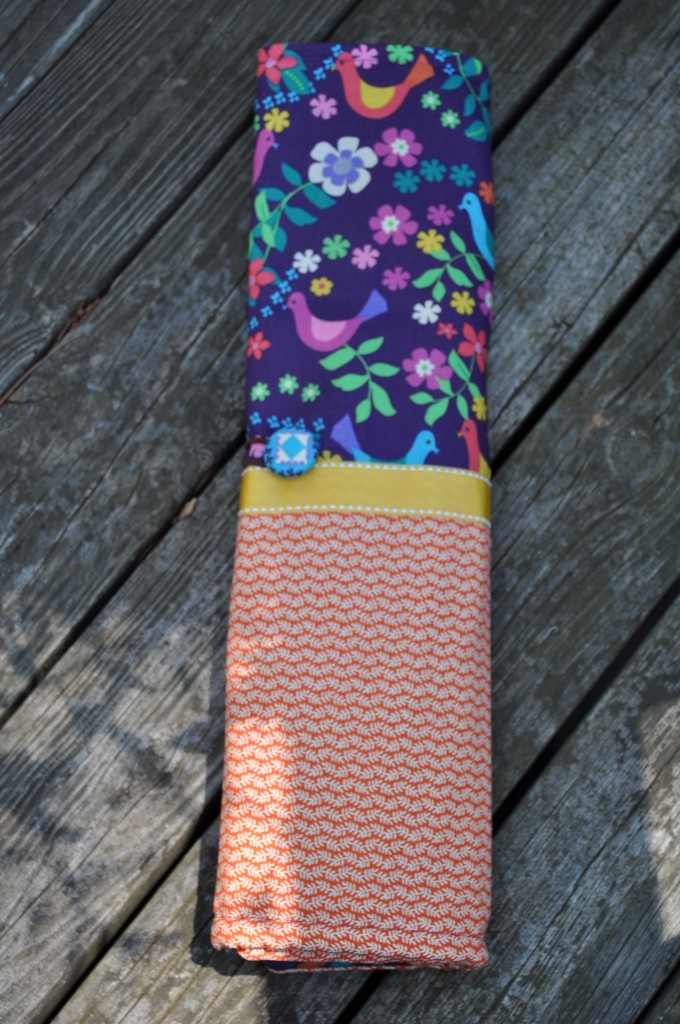
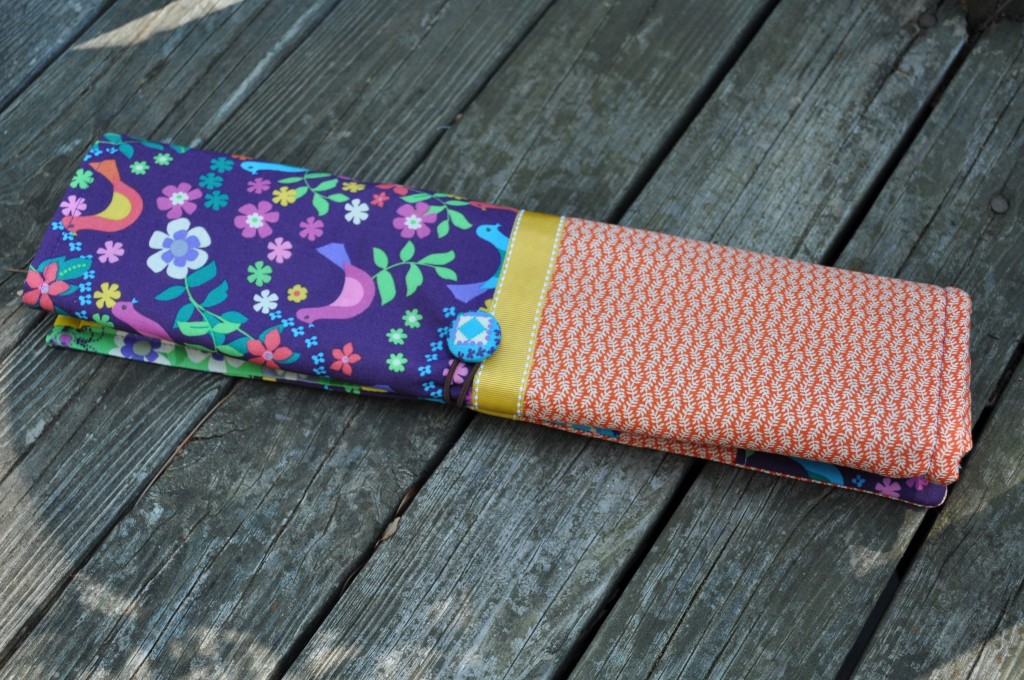
I made this super awesome knitting needle organizer for a friend just now and I’m pretty proud of it.

This was after I’d borrowed a pattern/tutorial from a cute new book that my friend had and spent a bunch of time making the whole thing (not to mention the time I spent making a cutting diagram from the cutting list in the book so I would be able to get everything I needed out of fat quarters I already had); only to notice at the end that it only holds needles up to 7″ tall. Really?
Really; a knitting needle case for only short needles?
Really; I didn’t notice until it was completely finished?

I seriously almost lost my mind over that one. It should be called the ‘Sock Knitting Only Organizer’ …come on!

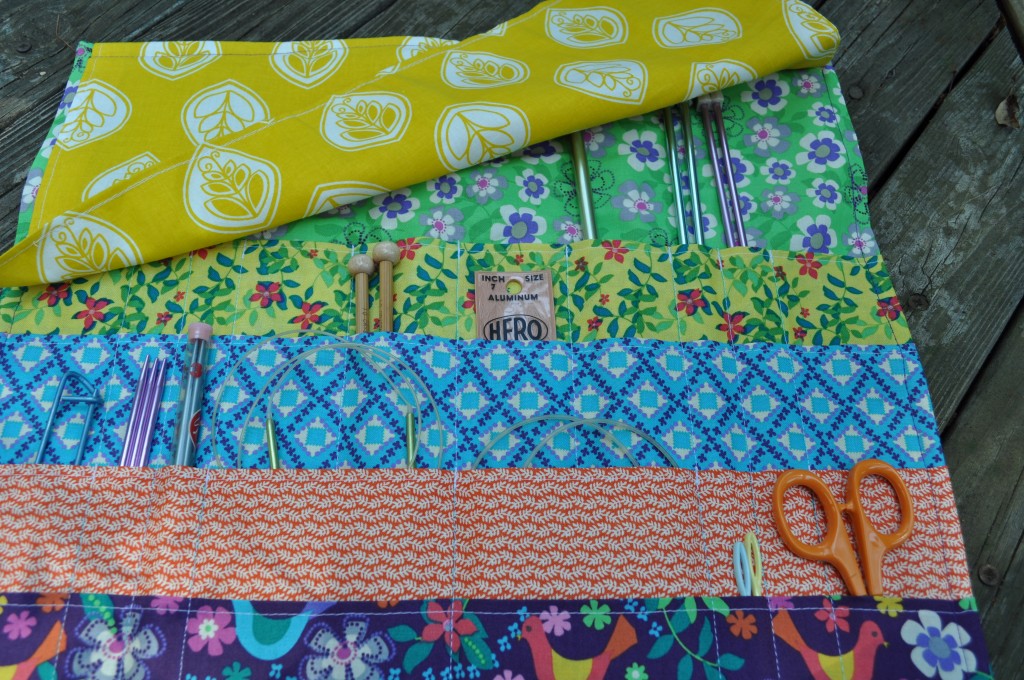
But, anyhow, here we are with this one now and look how cute it is!

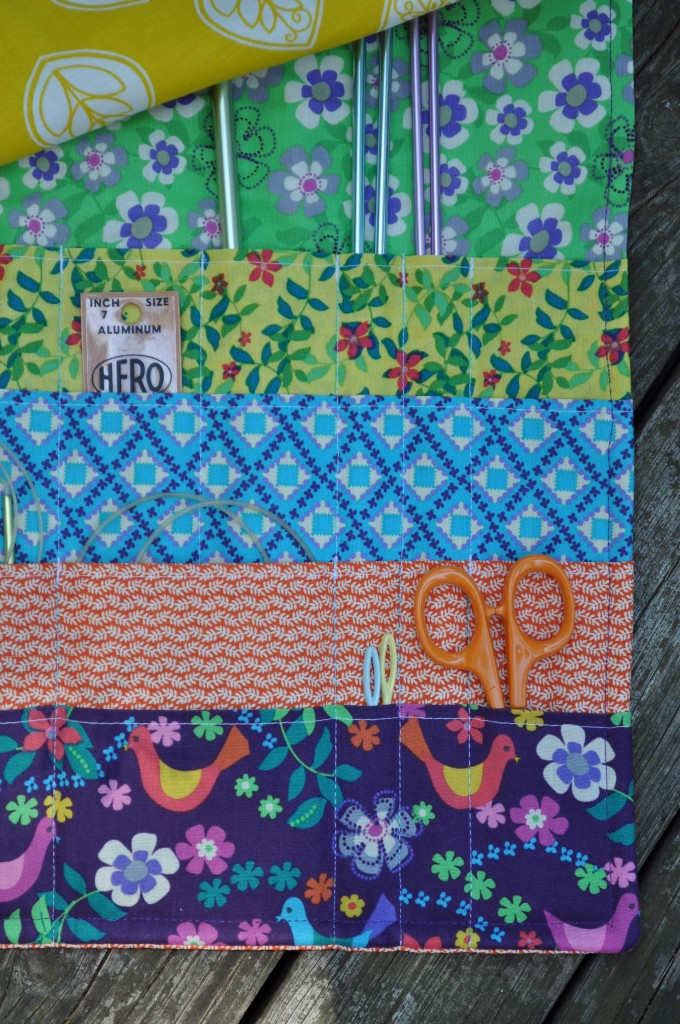
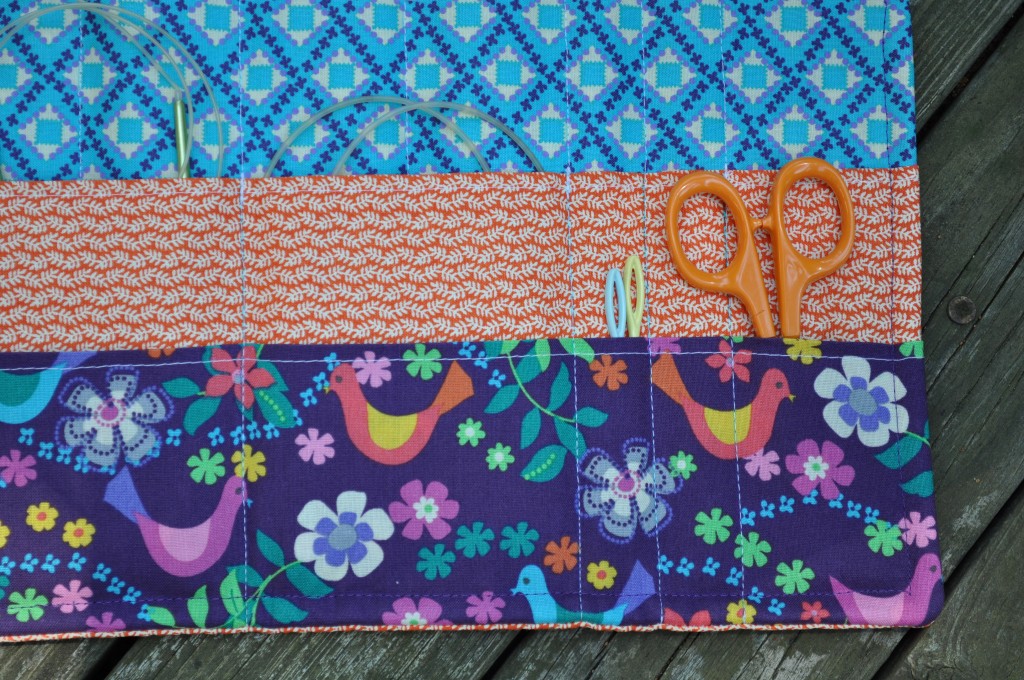
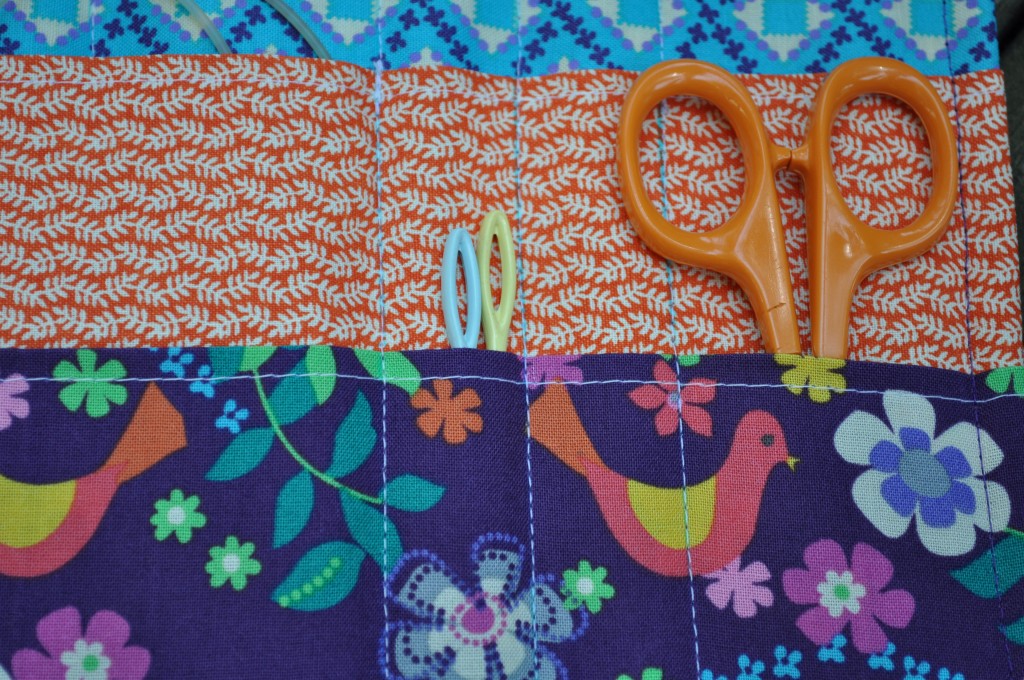
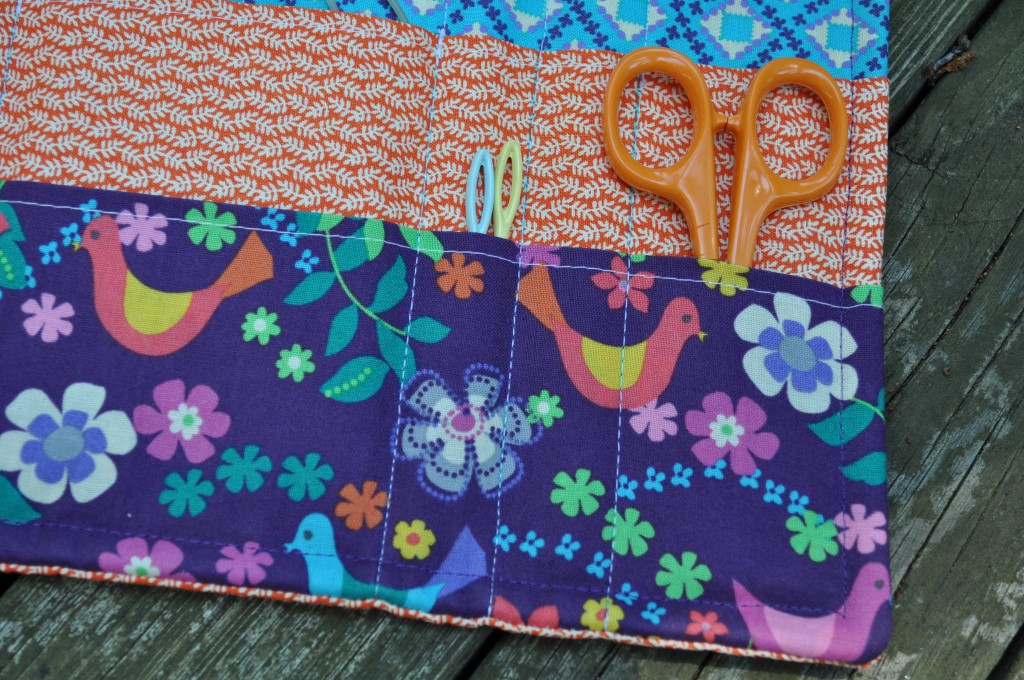
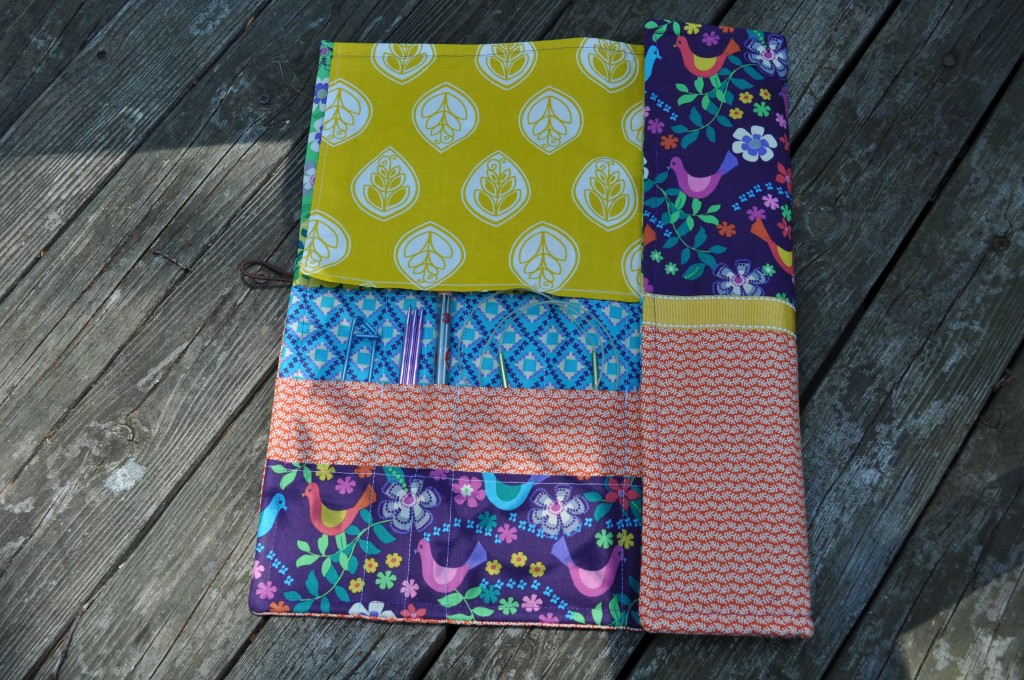
It has a pocket for just about everything; even for the connected needles (whatever those are called). I need to remember to measure all the pockets so I can make another before I give it away because I made it up as I went along. On the next one, I’d like to incorporate a zipper pocket for little bits like needle point covers and stitch markers and a measuring tape, etc.

I’m in love with most of this fabric; especially the bird print. They all came in a fat quarter bundle except the tiny orange print and the large yellow and white leaf print which were random additions because I needed more fabric. The next one I want to make is for a birthday gift and will be out of batik fat quarters, I think. Maybe I’ll make a tutorial out of that one.

I basically just made up the inside and outside pieces to measure 18″ across by 16 1/2″ tall before finishing. Then, I added a single layer of flannel between the two (I hate batting). I really think batting and binding is just good for quilts. Whenever I’ve followed instructions for making an accessory of some sort with batting and binding (like a knitting needle holder), I’ve always been disappointed in the puffy outcome. I love it like this way more.

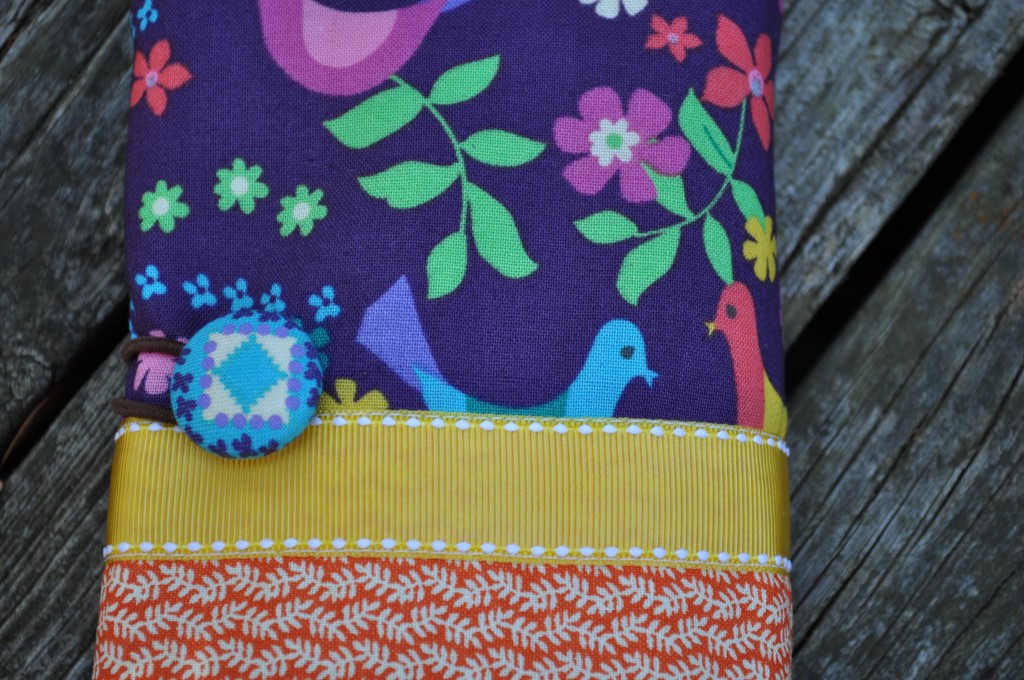
Anyway, after the outside and the inside were just the way I wanted them, I sandwiched it all together, put the flap inside the sandwich, placed the hair elastic where I wanted it, and sewed all the way around, leaving a good size gap for turning, and then once it was all turned out and pressed, I top stitched the whole thing, closing up the gap. I covered and sewed the button closure on last because I wasn’t quite sure where it needed to be.

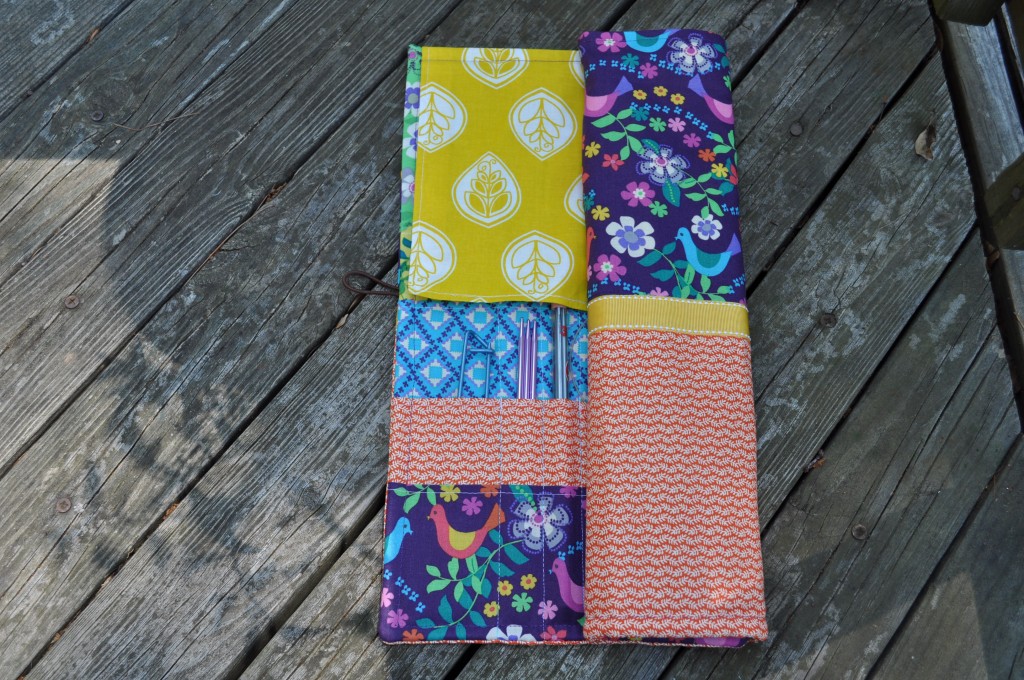
The pockets are pretty much in four equal sections, so it ends up folding up in quarters all the way across, which I like better than a traditional “roll”. (I didn’t want it to be like a sleeping bag…)

So, here it is, just in time for a friend’s bridal/bachelorette dinner this Saturday. Can’t wait to make the next and the next (I have at least two more people in mind) and who knows, maybe I’ll get one too!

Posted in Crafts | 2 Comments